CET Figure Series Questions with Solutions – Page 26
All 140 Figure Series questions from MBA CET 2023 and 2024 and 2025 and 2026 papers. Tap Show answer, or open the detailed solution (free login). Page 26 of 28.
The marked dot advances 2 positions CLOCKWISE at each step on an eight-position ring. Its fill alternates solid, hollow, solid, hollow. Apply both stated rules to choose the fifth frame. Positions are numbered 0–7 clockwise, starting at the top.
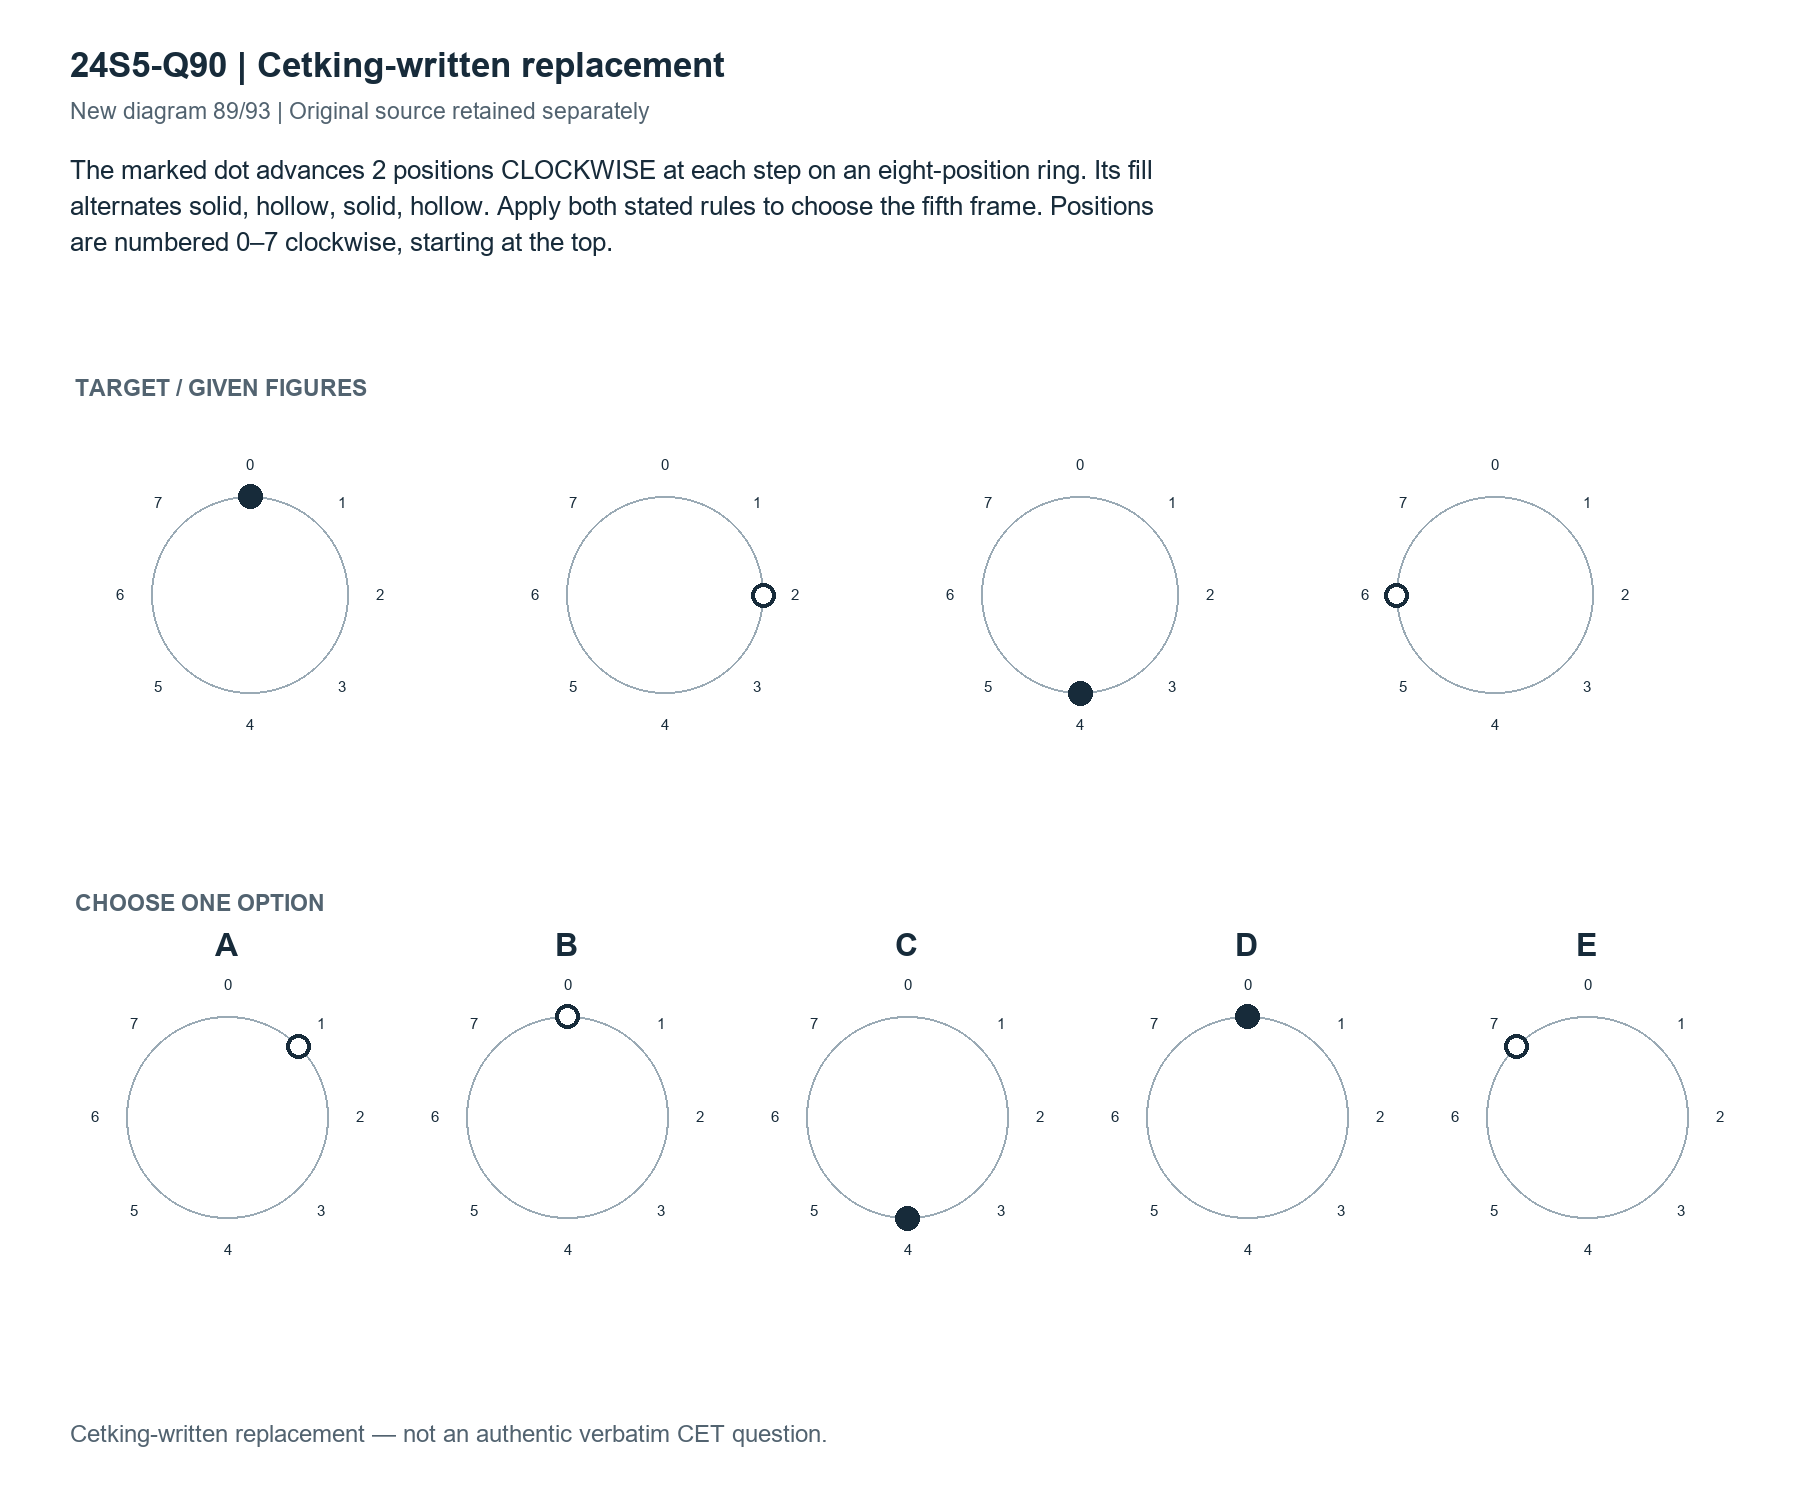
Answer: D. Position 0; solid dot
Solution — first steps
1. Positions recorded for frames 1 to 4: [0, 2, 4, 6].
The full step-by-step working opens with a free login.
The marked dot advances 2 positions CLOCKWISE at each step on an eight-position ring. Its fill alternates solid, hollow, solid, hollow. Apply both stated rules to choose the fifth frame. Positions are numbered 0–7 clockwise, starting at the top.
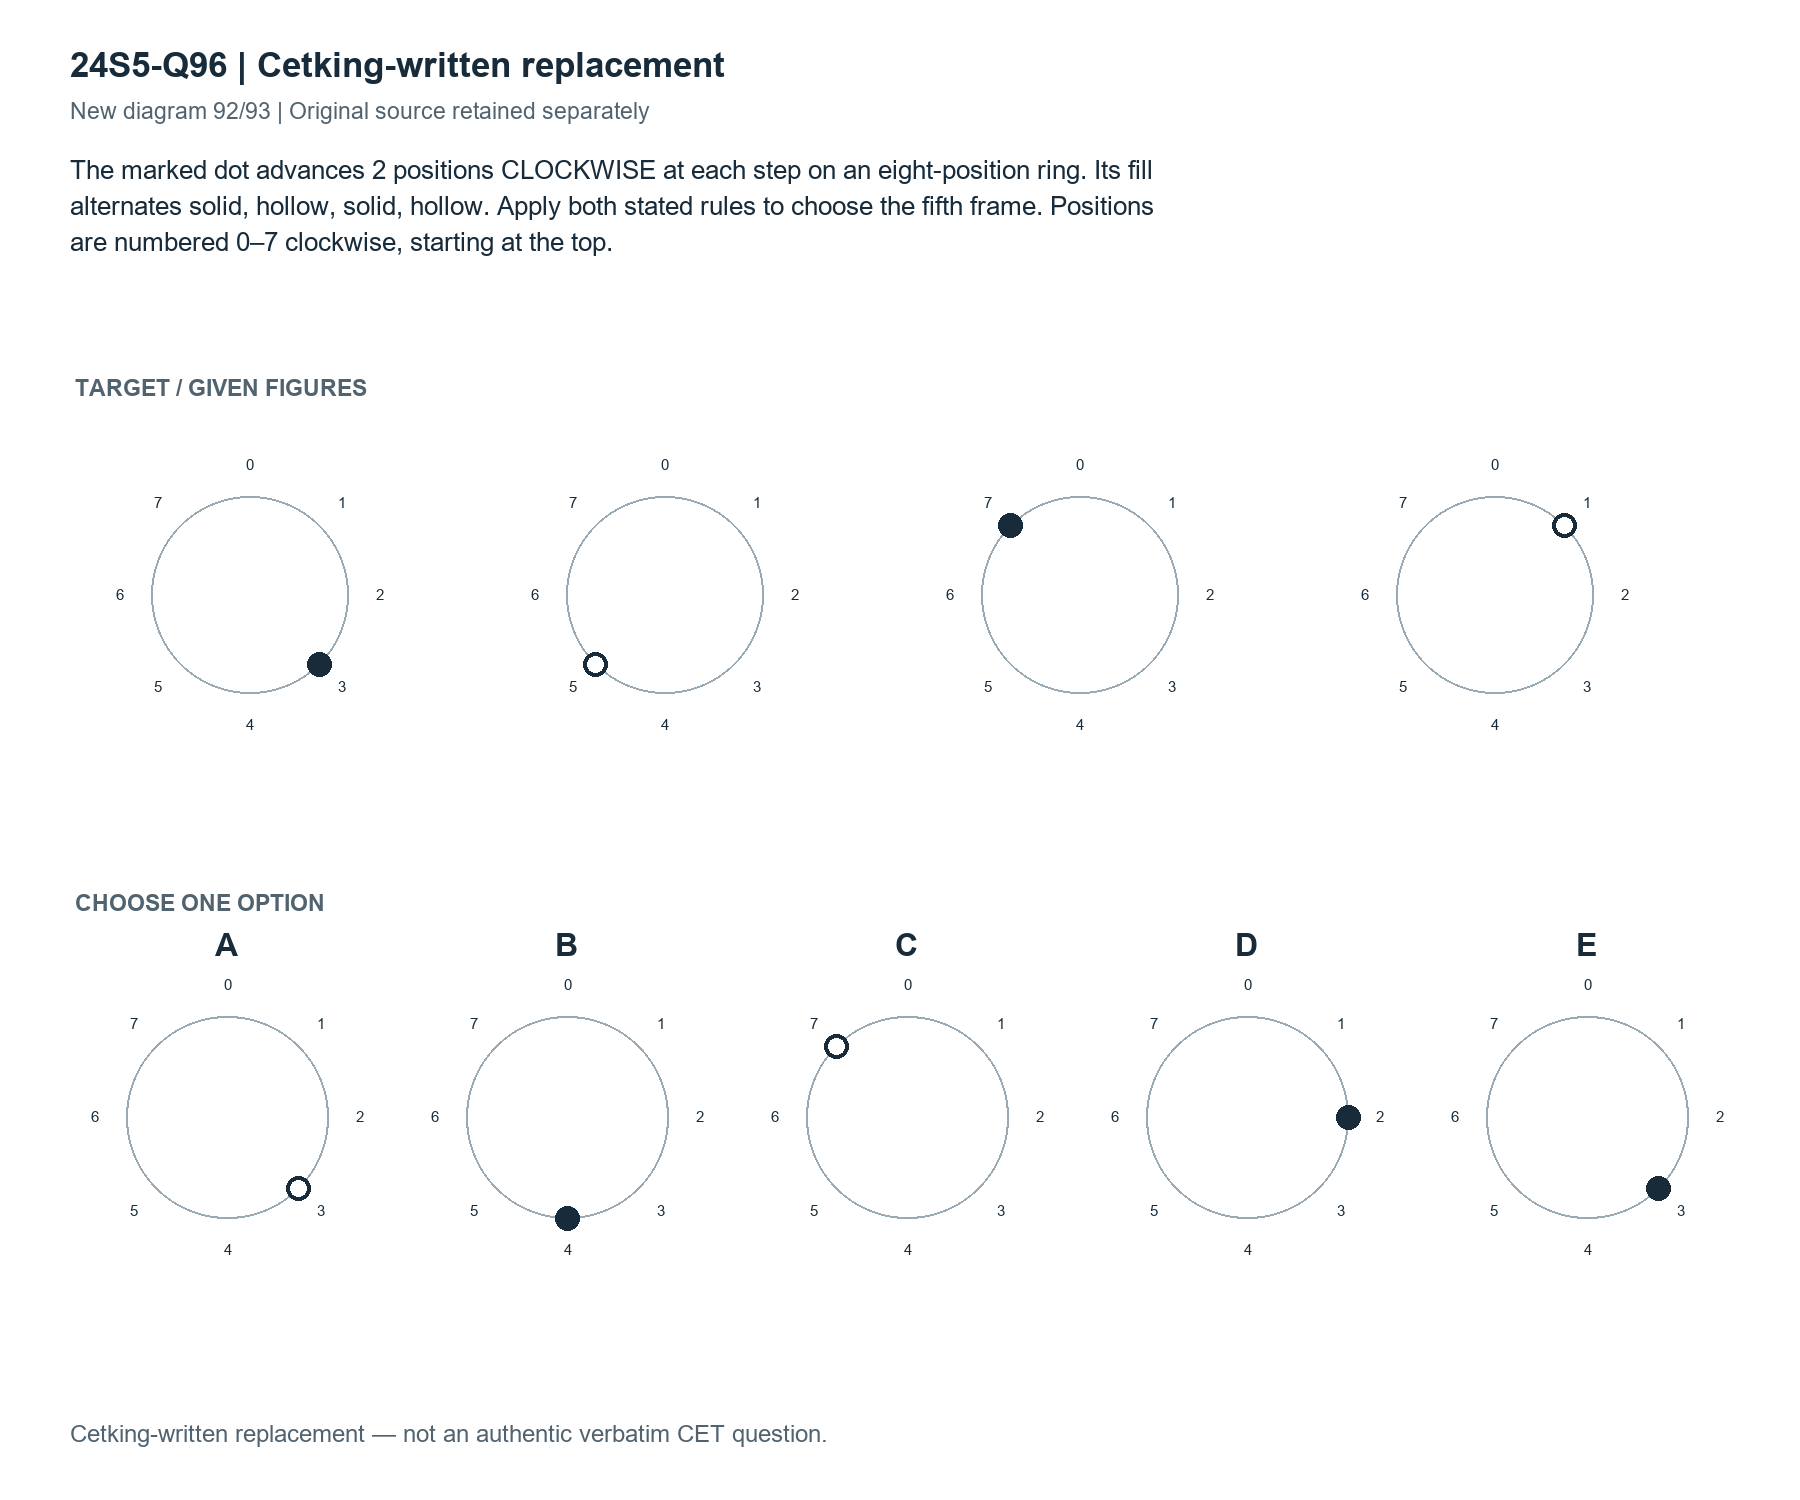
Answer: E. Position 3; solid dot
Solution — first steps
1. Positions recorded for frames 1 to 4: [3, 5, 7, 1].
The full step-by-step working opens with a free login.
The marked dot advances 3 positions CLOCKWISE at each step on an eight-position ring. Its fill alternates solid, hollow, solid, hollow. Apply both stated rules to choose the fifth frame. Positions are numbered 0–7 clockwise, starting at the top.
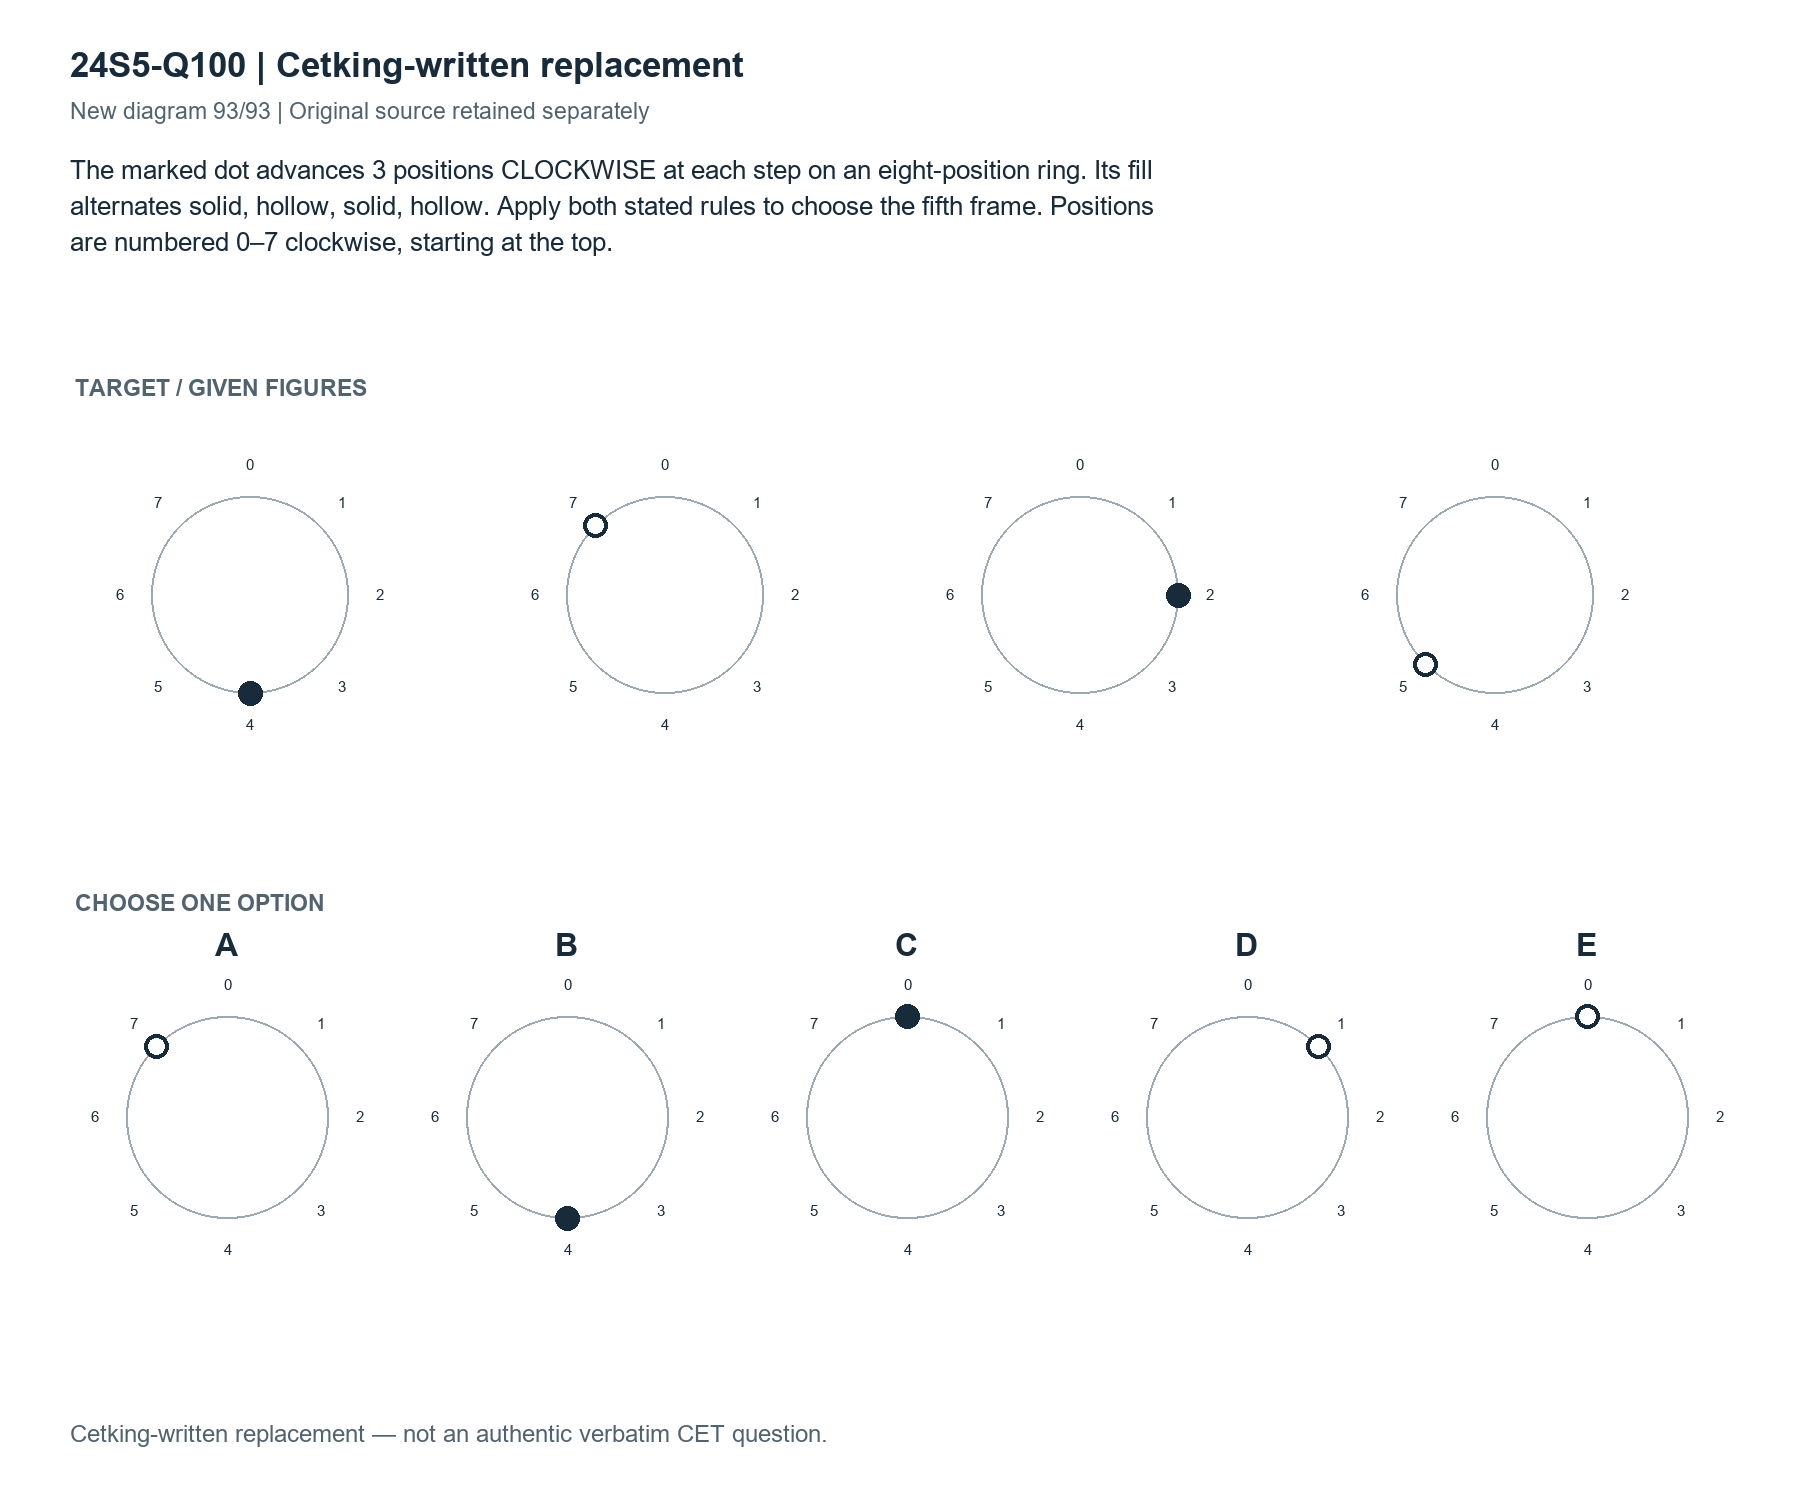
Answer: C. Position 0; solid dot
Solution — first steps
1. Positions recorded for frames 1 to 4: [4, 7, 2, 5].
The full step-by-step working opens with a free login.
Select a suitable figure from the Answer Figures that would replace the question mark
(?).
Problem Figures: Answer Figures:
(A) (B) (C) (D) (1) (2) (3) (4) (5)
A.1
B.2
C.3
D.4
E.5
(?).
Problem Figures: Answer Figures:
(A) (B) (C) (D) (1) (2) (3) (4) (5)
A.1
B.2
C.3
D.4
E.5
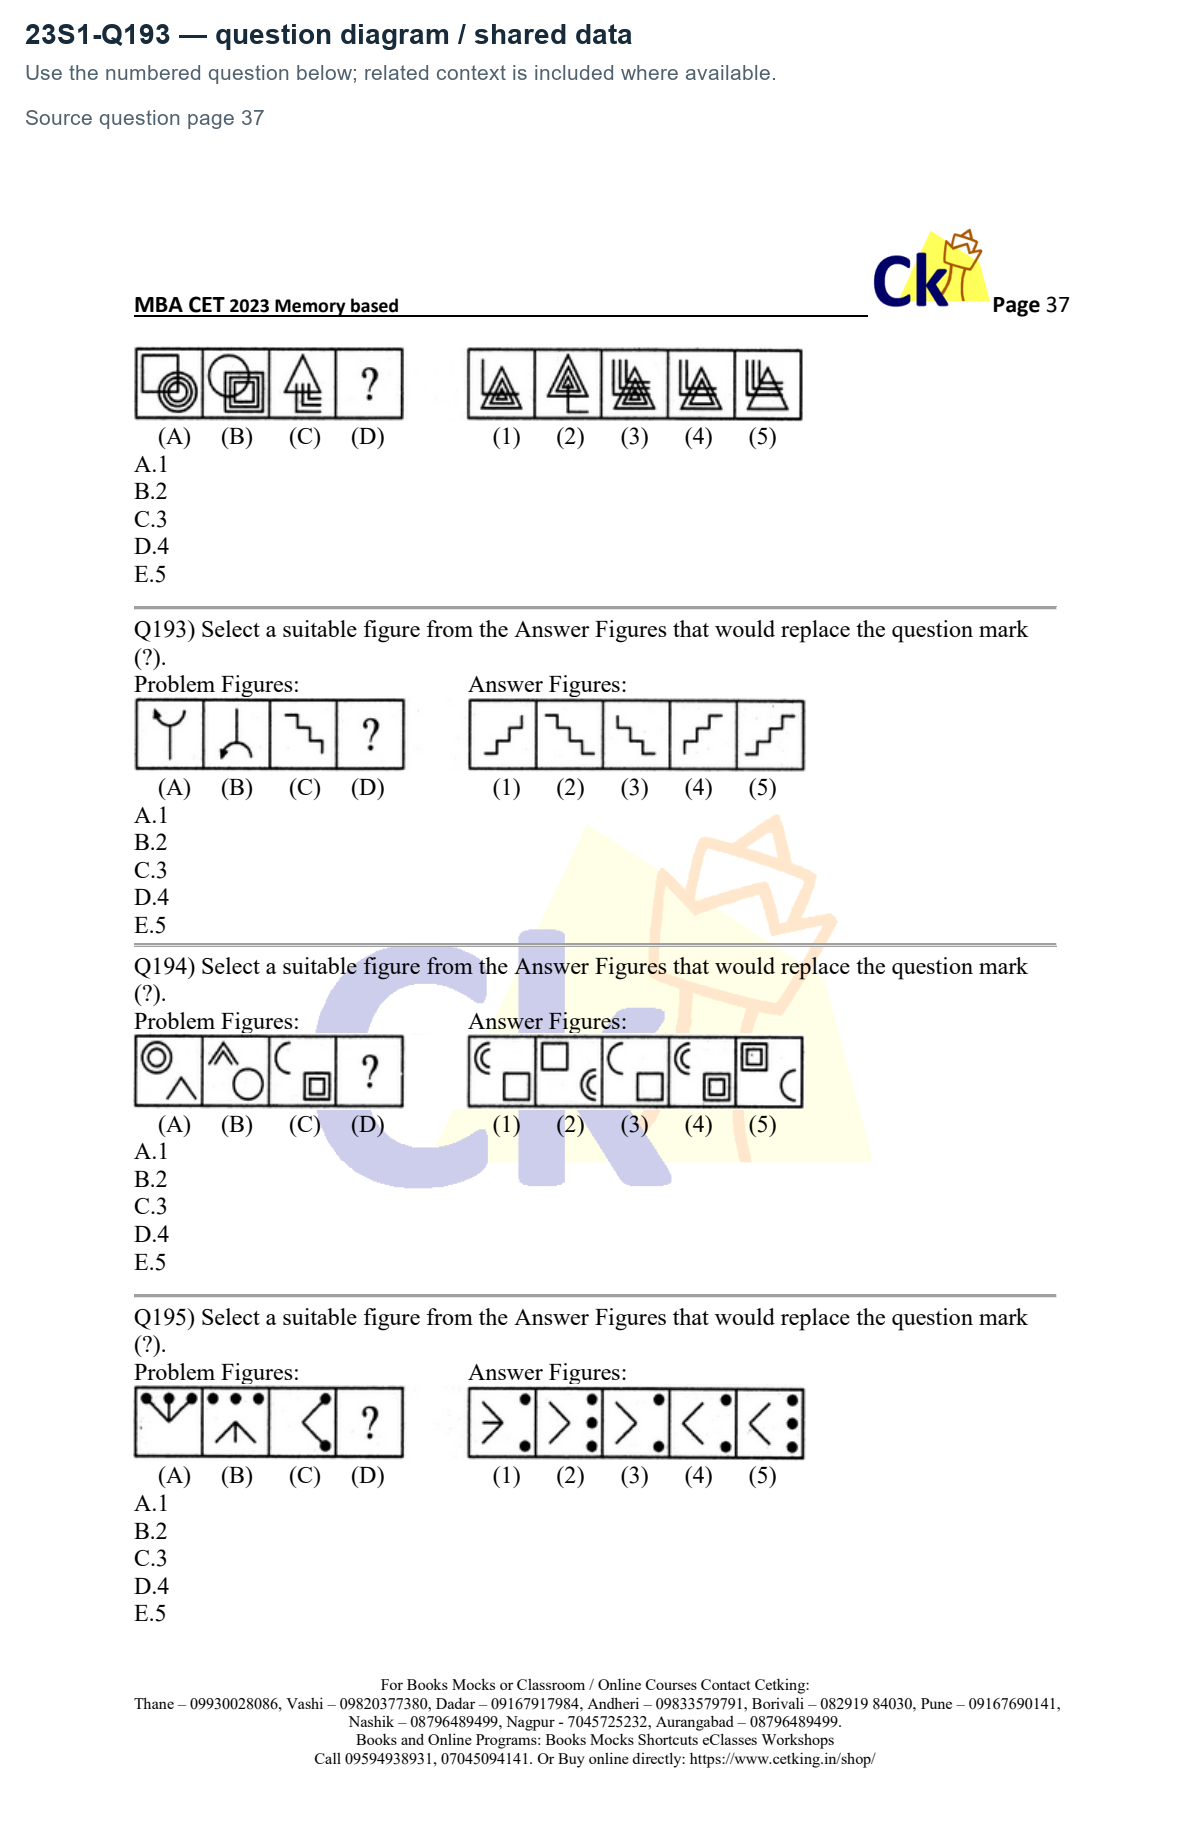
Answer: D. 4
Solution — first steps
A→B reflects the curved symbol top-to-bottom, retaining the left side of its arrowhead. Apply the same vertical reflection to the staircase: it rises from left to right, begins with a vertical segment at the bottom-left and ends with a horizontal segment at the top-right.
The full step-by-step working opens with a free login.
Select a suitable figure from the Answer Figures that would replace the question mark
(?).
Problem Figures: Answer Figures:
(A) (B) (C) (D) (1) (2) (3) (4) (5)
A.1
B.2
C.3
D.4
E.5
(?).
Problem Figures: Answer Figures:
(A) (B) (C) (D) (1) (2) (3) (4) (5)
A.1
B.2
C.3
D.4
E.5
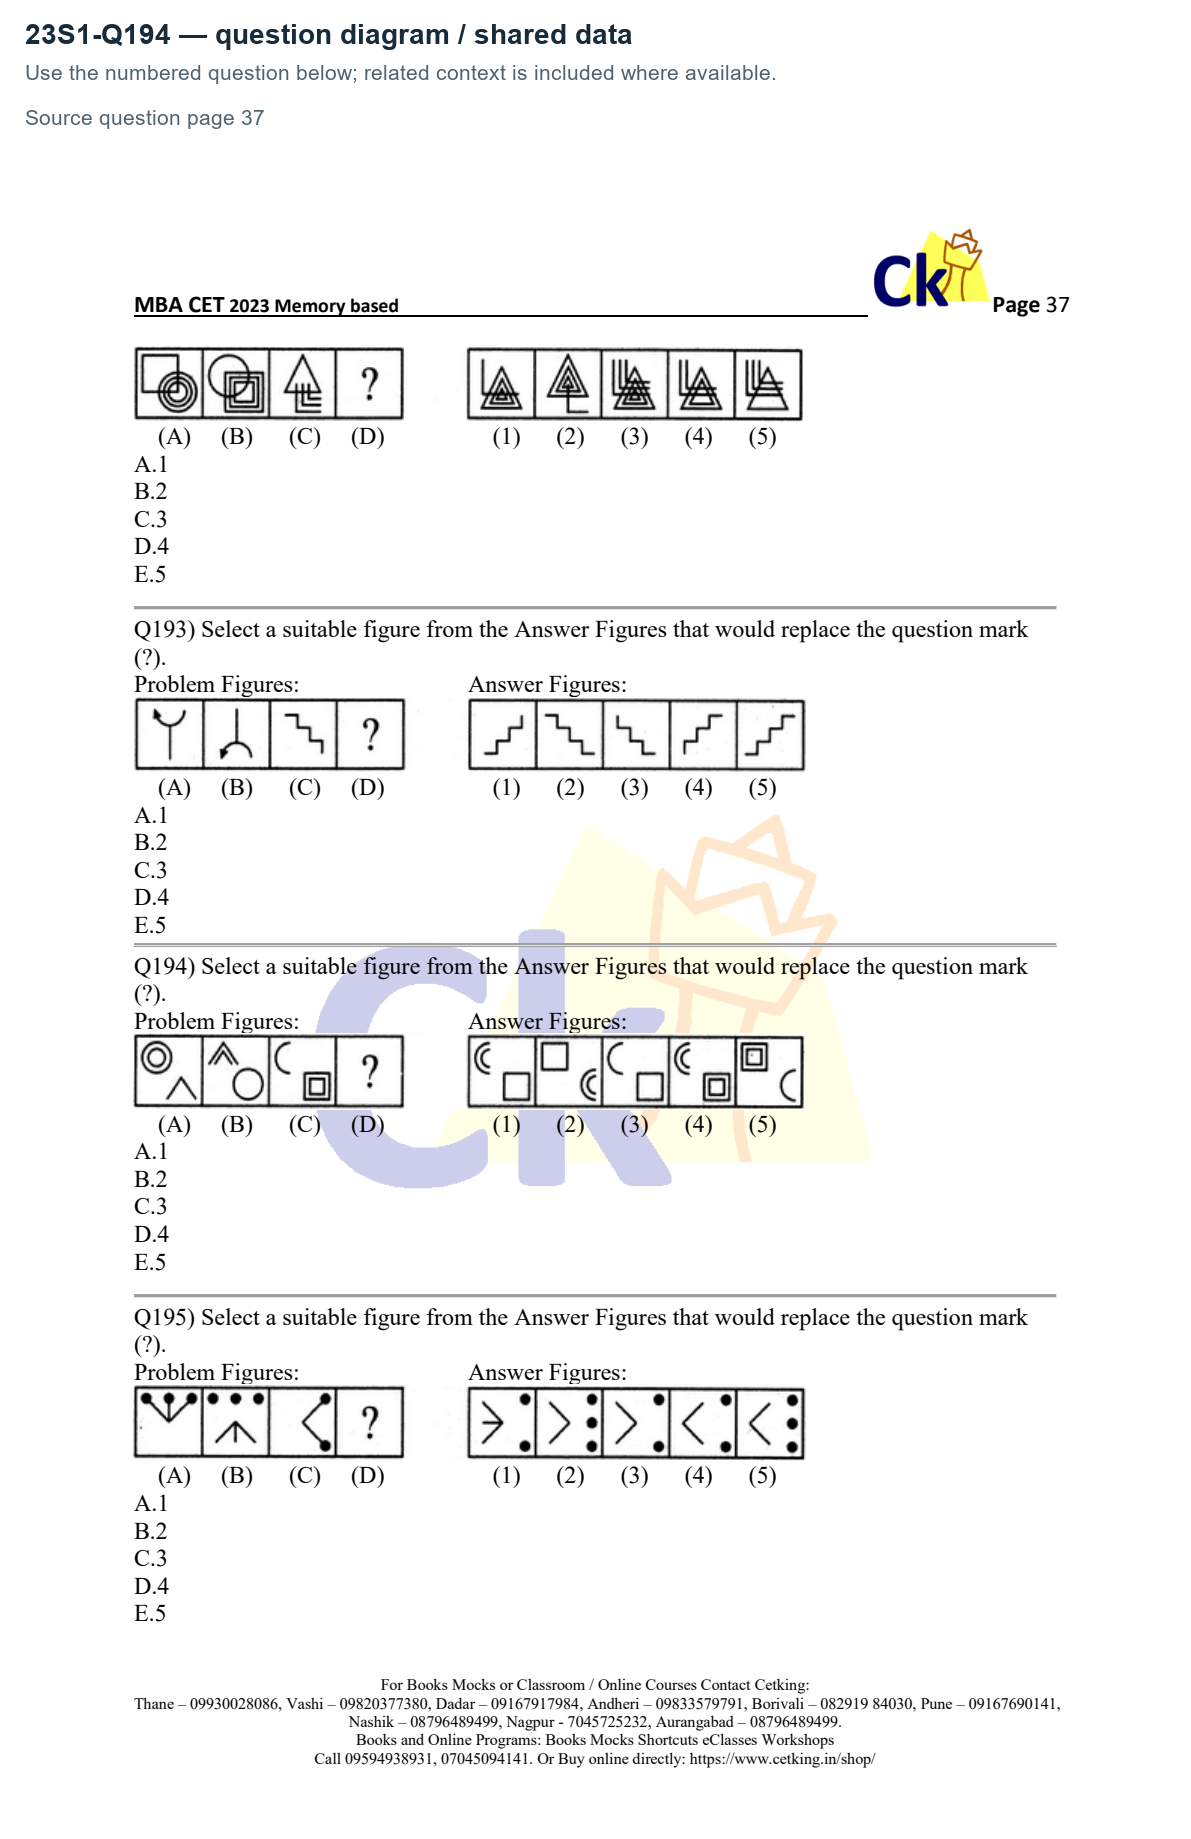
Answer: A. 1
Solution — first steps
In A→B, the two component types exchange the number of outlines while keeping their positions. Thus C's single upper-left arc becomes a double arc and its lower-right double square becomes a single square.
The full step-by-step working opens with a free login.