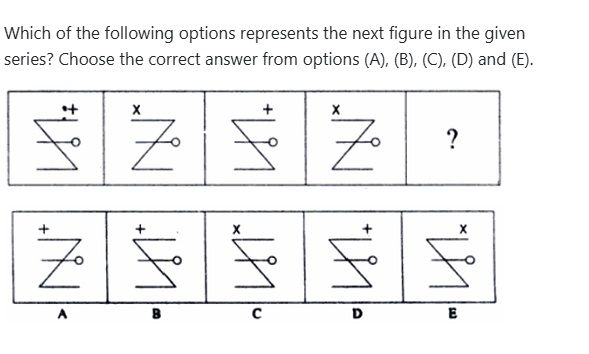
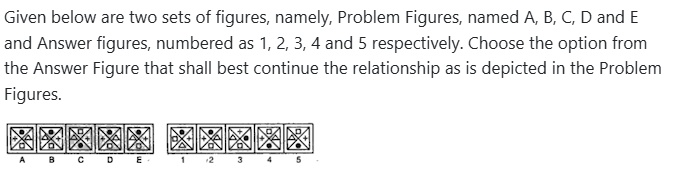
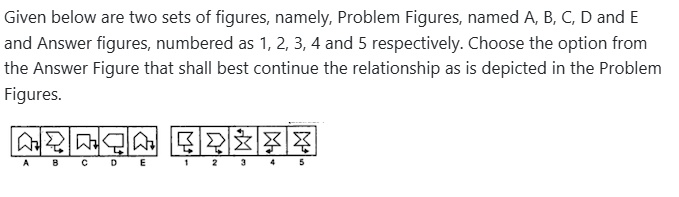
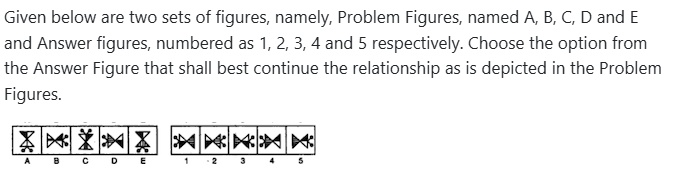
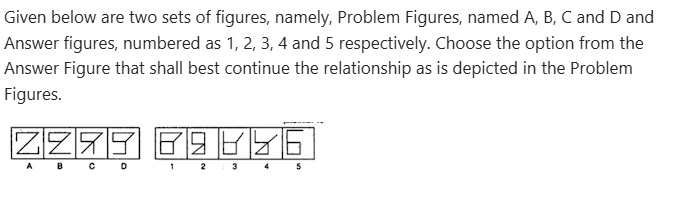
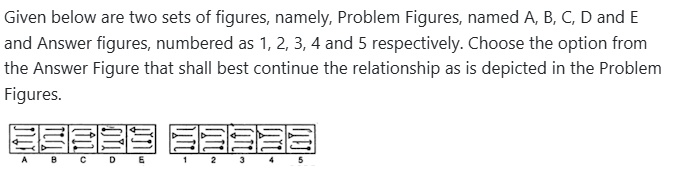
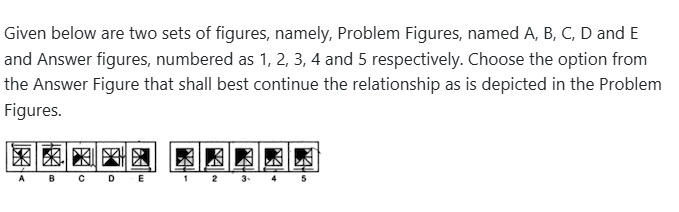
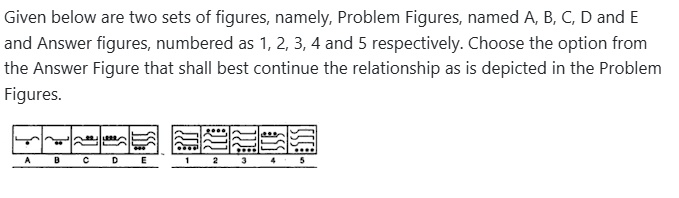
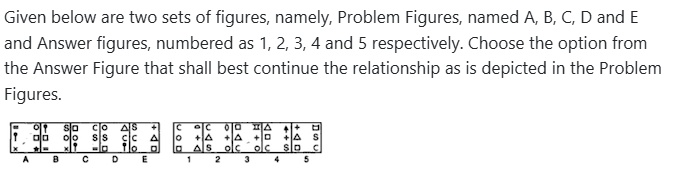
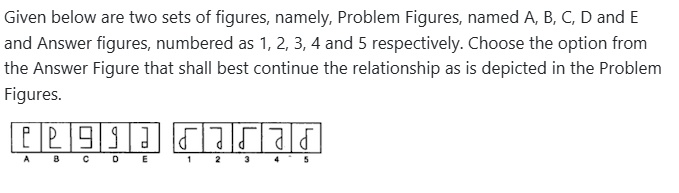
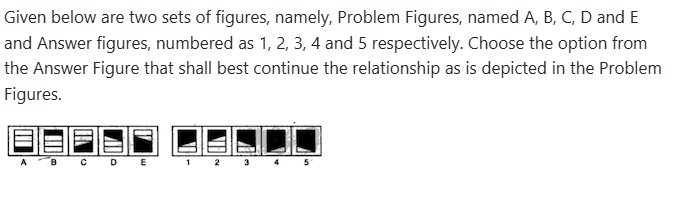
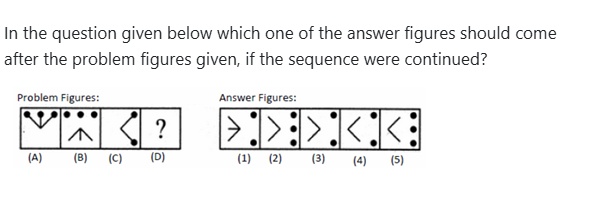
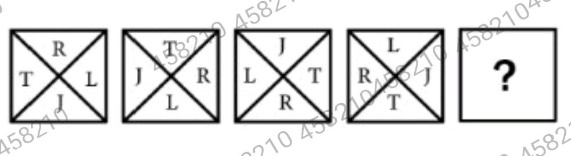
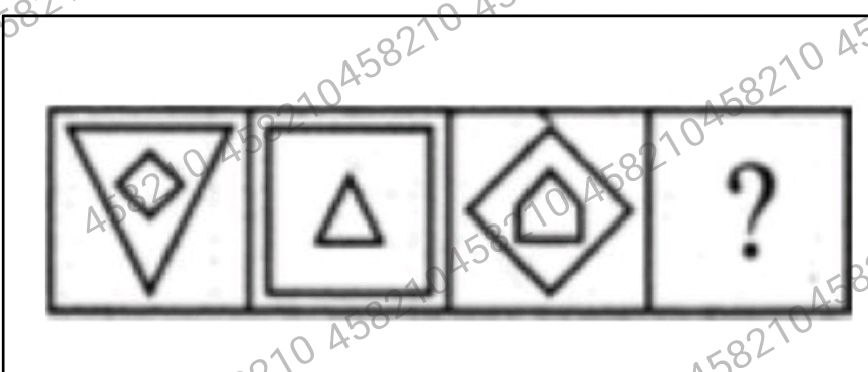
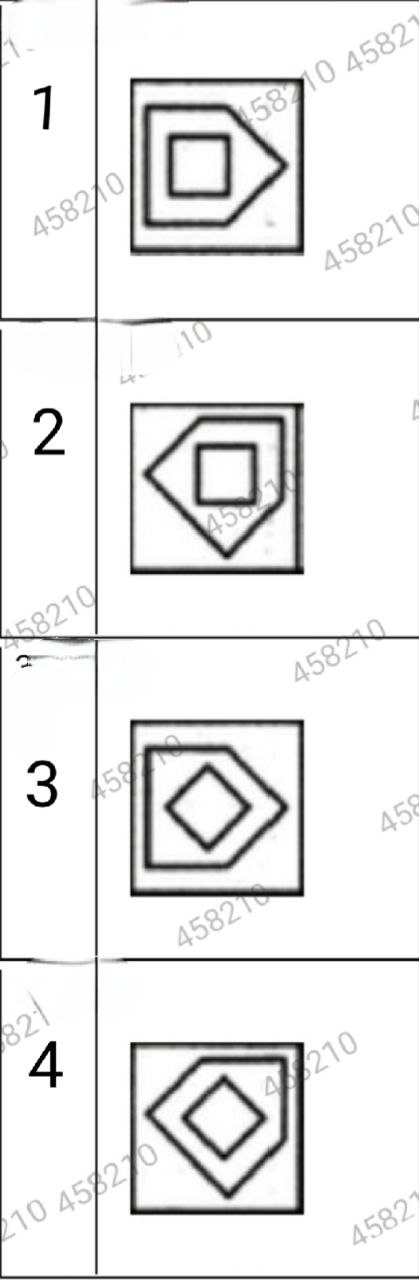
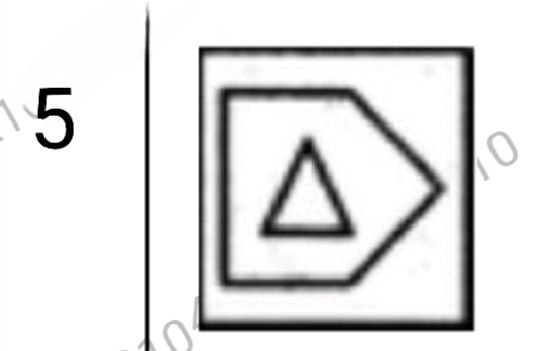
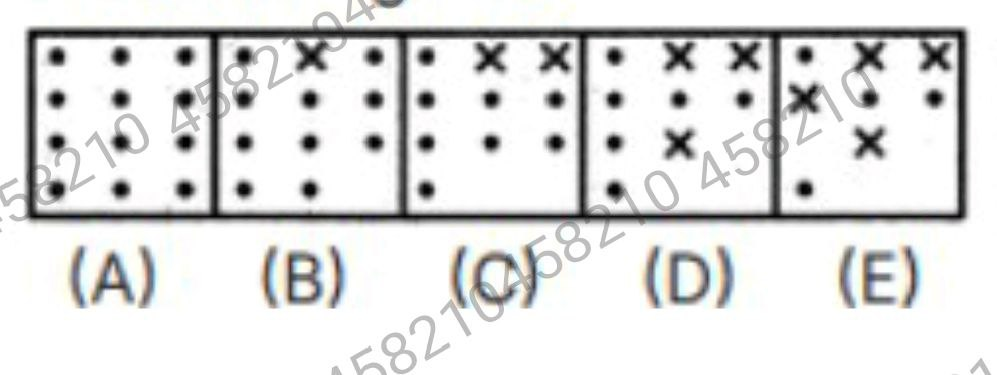
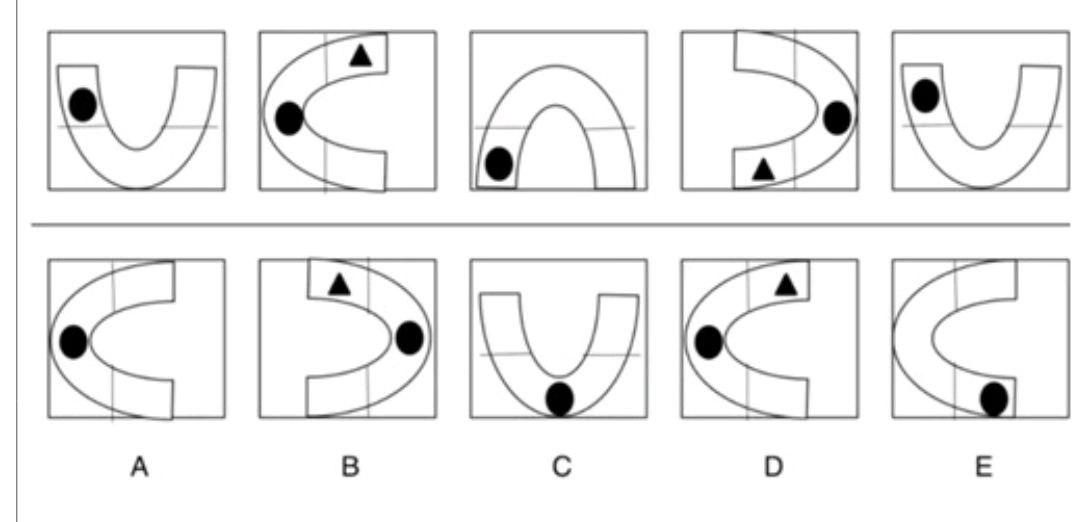
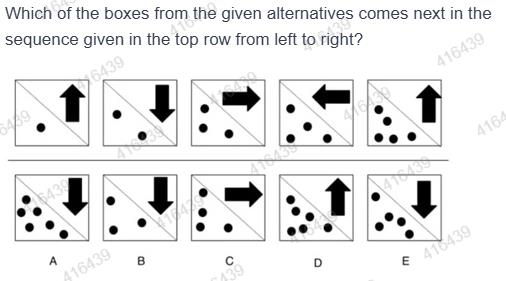
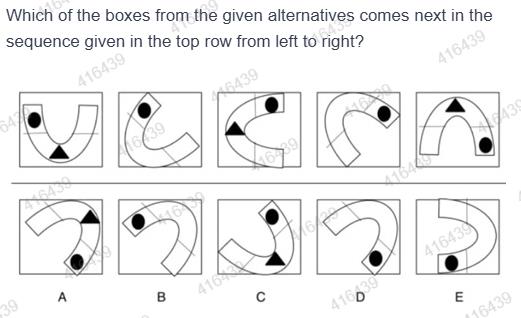
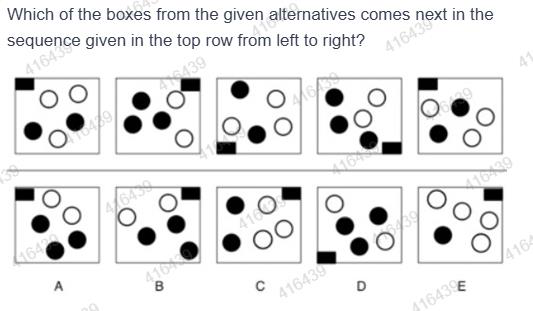
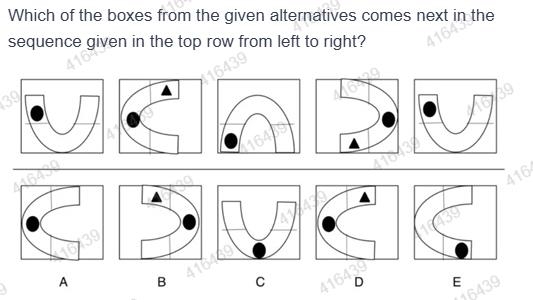
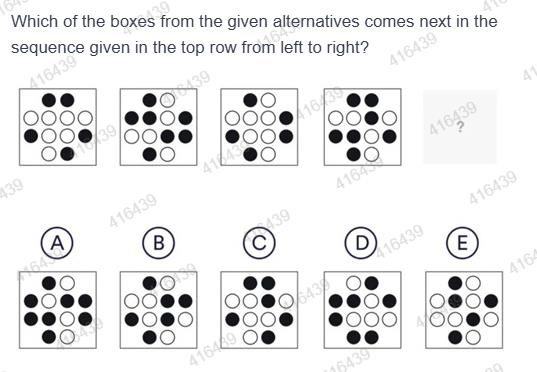
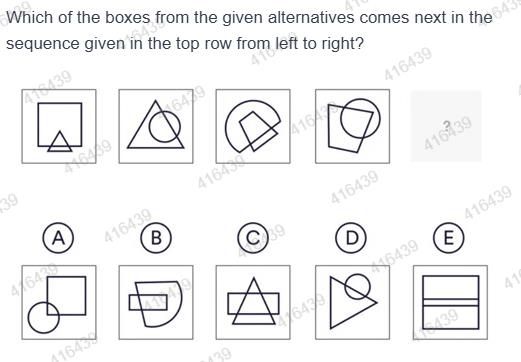
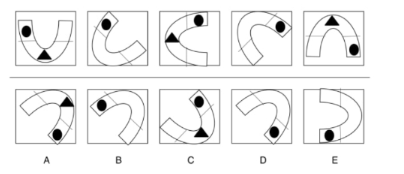
Which of the following options represents the next figure in the given series? Choose the correct answer from options (A), (B), (C), (D) and (E).
- AA
- BB
- CC
- DD
- EE
Show answerHide answer
Official CET key: D · Cetking's answer: E — see why below
Approach: Figure series with two alternating features.
Solution:
Main figure alternates: S-shaped (figures 1, 3) and Z-shaped (figures 2, 4) ⇒ figure 5 is S-shaped.
Top symbol alternates + (figures 1, 3) and × (figures 2, 4) ⇒ figure 5 has +.
Position of the top symbol also alternates: + sits on the right half, × on the left half ⇒ the + must be on the right.
Only option D has the S-shape with + on the right side.
Why the other options are wrong:
A: Z-shaped figure.
B: correct shape and +, but the + is on the left side.
C, E: carry × instead of +.
Cetking shortcut: With an alternating series, the 5th figure is a copy of figure 3 — just find the option identical to figure 3.
Answer: D
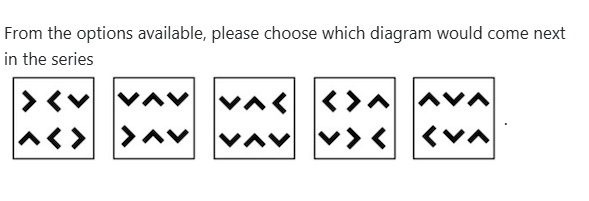
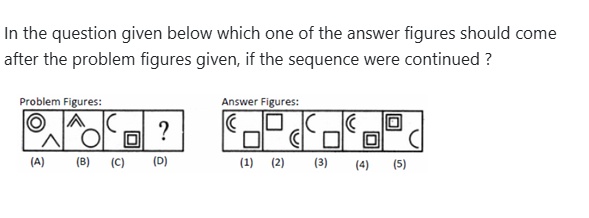
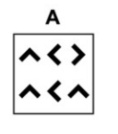
From the options available, please choose which diagram would come next in the series
- A
- B
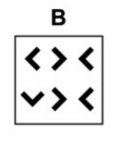
- C
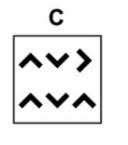
- D
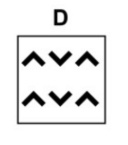
- E
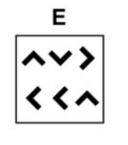
Show answerHide answer
Official CET key: C · Cetking's answer: A — see why below
Approach: Figure series: each of the six arrowheads (2 rows × 3) turns 90° clockwise, with a fixed set of positions pausing at each step.
Solution:
Number positions 1–3 (top row) and 4–6 (bottom row). Directions: R, L, U, D.
Fig 1: R L D / U L R. Fig 2: D U D / R U D ⇒ all turned 90° clockwise except position 3.
Fig 2 → Fig 3 (D U L / D U D): only positions 3 and 4 turned.
Fig 3 → Fig 4 (L R U / D R L): all turned except position 4.
Fig 4 → Fig 5 (U D U / L D U): all turned except position 3.
The 3-step cycle repeats (all-but-3, only 3 & 4, all-but-4): next step turns only positions 3 and 4.
Fig 5 → Fig 6: position 3 U → R, position 4 L → U ⇒ U D R / U D U, i.e. ∧ ∨ > / ∧ ∨ ∧ = Option C.
Why the other options are wrong:
A: top row ∧ < > changes positions 2 and 3 wrongly.
B: resembles figure 4; positions 1, 2, 5, 6 should not change from figure 5.
D: position 3 not turned (same top row as figure 5).
E: position 4 is not turned and position 5 changes when it should not.
Cetking shortcut: Compare figure 5 with each option: only positions 3 and 4 should change, each by a 90° clockwise turn — only C does that.
Answer: C
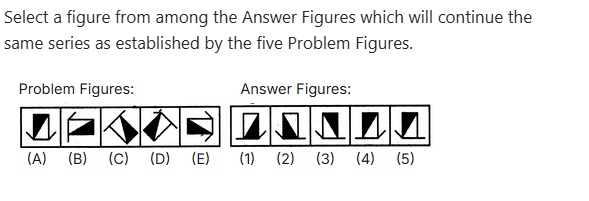
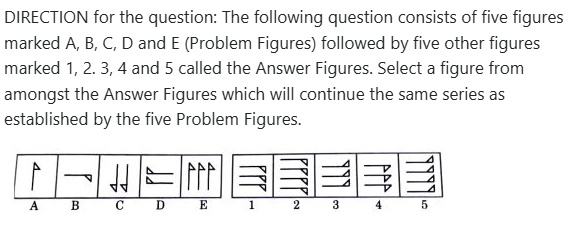
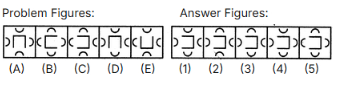
Select a figure from among the Answer Figures which will continue the same series as established by the five Problem Figures.
- A1
- B2
- C3
- D4
- E5
Show answerHide answer
Official CET key: C · Cetking's answer: B — see why below
Approach: Figure series: the figure turns clockwise by 90° and 45° alternately, and the shaded half switches side at every step.
Solution:
Track the long line (the 'base' with bent ends): A bottom → B left (90° clockwise) → C upper-left (45°) → D upper-right (90°) → E right (45°).
Next turn is 90° clockwise ⇒ the base comes to the bottom again (all answer figures have this).
Shading: seen with the base at the bottom, the black triangle is on the upper-left in A, upper-right in B, and keeps switching; in E it is on the upper-left again.
So the next figure has the base at the bottom and the black triangle on the upper-right, with the diagonal running from top-left to bottom-right.
Only Answer Figure 3 shows this.
Why the other options are wrong:
Figure 1: black part is at the lower-right.
Figure 2: black part is at the lower-left.
Figures 4 and 5: black part is at the upper-left, which repeats E's shading instead of switching.
Cetking shortcut: First fix the position of the base (bottom), then check only the side of the black triangle.
Answer: C
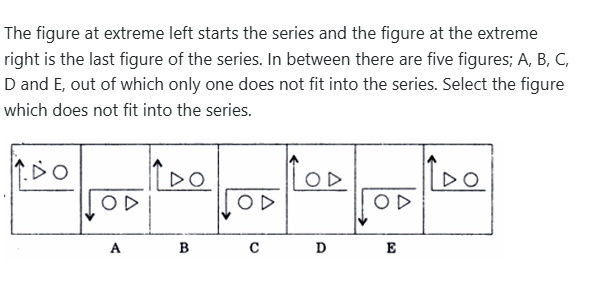
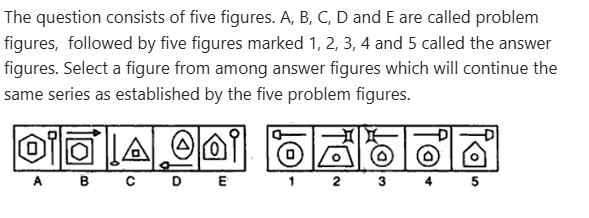
The figure at extreme left starts the series and the figure at the extreme right is the last figure of the series. In between there are five figures; A, B, C, D and E, out of which only one does not fit into the series. Select the figure which does not fit into the series.
- AA
- BB
- CC
- DD
- EE
Show answerHide answer
Answer: D ✓ official key
Approach: Odd figure in a series: find the alternating rule from the first and last figures.
Solution:
The L-line with an arrow alternates: up-arrow at the top (figures 1, B, D, last) and down-arrow at the bottom (A, C, E).
Order of the triangle and circle also alternates: figure 1 triangle-circle, A circle-triangle, B triangle-circle, C circle-triangle.
So D should be triangle-circle, E circle-triangle, last triangle-circle (which matches).
D shows circle-triangle ⇒ D does not fit.
Why the other options are wrong:
A, B, C, E: follow both alternations.
Cetking shortcut: Mark each figure 'up/down' and 'triangle first/circle first'; the one breaking the alternation is the answer.
Answer: D
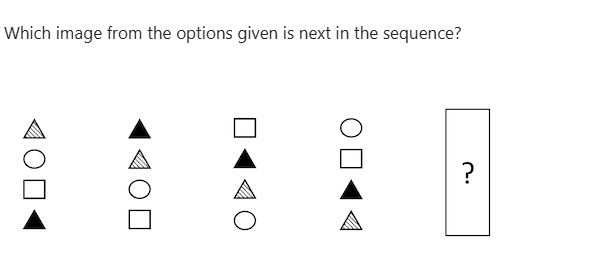
Which image from the options given is next in the sequence?
- A
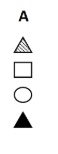
- B
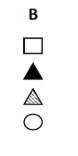
- C
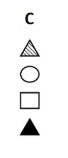
- D
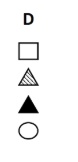
- E
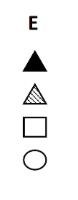
Show answerHide answer
Official CET key: C · Cetking's answer: B — see why below
Approach: Figure series: the column of four shapes moves down one place each step; the bottom shape goes to the top.
Solution:
Fig 1: hatched triangle, circle, square, black triangle.
Fig 2: black triangle, hatched triangle, circle, square.
Fig 3: square, black triangle, hatched triangle, circle.
Fig 4: circle, square, black triangle, hatched triangle.
Fig 5: hatched triangle, circle, square, black triangle (back to Fig 1) = Option C.
Why the other options are wrong:
A: square and circle swapped.
B: same as Fig 3.
D: order square, hatched, black, circle — not a shift of Fig 4.
E: order not a cyclic shift.
Cetking shortcut: Four shapes shifting cyclically repeat after 4 steps ⇒ Fig 5 = Fig 1.
Answer: C
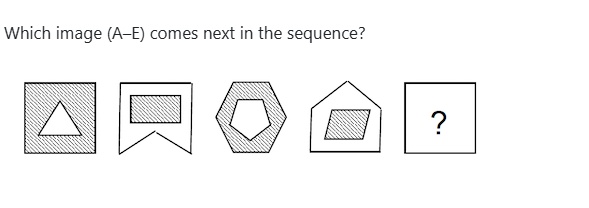
Which image (A–E) comes next in the sequence?
- A
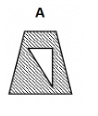
- B
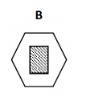
- C
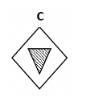
- D
- E
Show answerHide answer
Official CET key: A · Cetking's answer: B — see why below
Approach: Figure series: outer and inner shapes follow side counts, and shading alternates.
Solution:
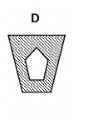
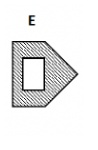
Outer shape sides: 4 (square), 5 (banner), 6 (hexagon), 5 (house) ⇒ up then down: next is 4.
Inner shape sides: 3, 4, 5, 4 ⇒ always one less than the outer ⇒ next is 3 (triangle).
Shading alternates: outer shaded (1), inner shaded (2), outer shaded (3), inner shaded (4) ⇒ next: outer shaded, inner white.
Option A: shaded four-sided outer shape (trapezium) with a white triangle inside.
Why the other options are wrong:
B: hexagon outer, rectangle inner, outer white.
C: inner shaded.
D: inner pentagon (5 sides).
E: outer pentagon, inner rectangle.
Cetking shortcut: Inner sides = outer sides − 1 and shading alternates: just look for 'shaded 4-sided with white triangle'.
Answer: A
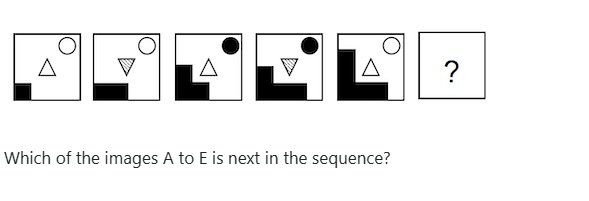
Which of the images A to E is next in the sequence?
- A
- B
- C
- D
- E
Show answerHide answer
Official CET key: B · Cetking's answer: A — see why below
Approach: Figure series with three independent elements.
Solution:
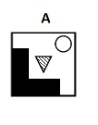
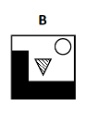
Black block: grows by one unit each step, alternately to the right and upward (right, up, right, up) ⇒ next it extends to the right, so the bottom strip reaches the right edge while the column keeps its height.
Triangle: white upright and hatched inverted alternate ⇒ next is hatched, pointing down.
Circle: white, white, black, black, white ⇒ pairs ⇒ next is white.
Option B has all three.
Why the other options are wrong:
A: black strip has not extended to the right edge.
C: upright hatched triangle and black circle.
D: white upright triangle and the black part grows upward.
E: black circle.
Cetking shortcut: Check the two easy elements first (triangle, circle): only A and B survive; the black block decides.
Answer: B
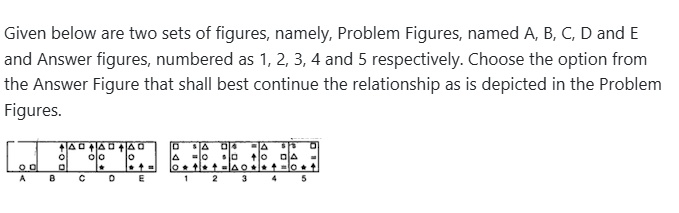
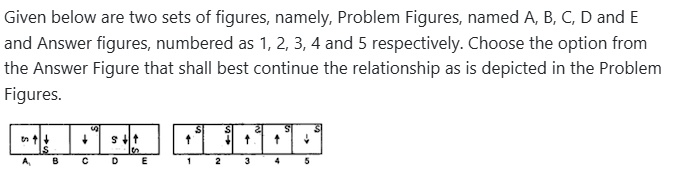
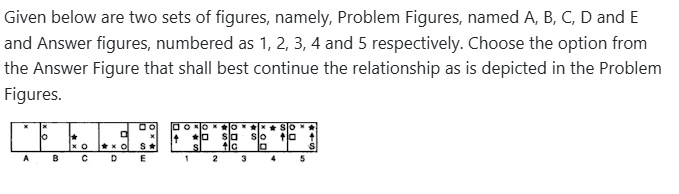
Given below are two sets of figures, namely, Problem Figures, named A, B, C, D and E and Answer figures, numbered as 1, 2, 3, 4 and 5 respectively. Choose the option from the Answer Figure that shall best continue the relationship as is depicted in the Problem Figures.
- A1
- B2
- C3
- D4
- E5
Show answerHide answer
Answer: D ✓ official key
Approach: Count the symbols and track their positions from figure to figure.
Solution:
Symbols: A = 2, B = 3, C = 4, D = 5, E = 6 → the next figure has 7.
Each step: one old symbol moves and one new symbol appears (B adds ↑, C adds △, D adds ★, E adds =).
In E: △ □ on top, ○ in the middle-left, ★ ↑ = along the bottom.
Next: the bottom row ★ ↑ =, △ and ○ stay; □ shifts down to the middle-right and the new symbol S enters at the top-right → figure 4.
Why the other options are wrong:
1, 3, 5: several of E's symbols (△, ○, the bottom row) are moved at once.
2: S is added but nothing moves, which breaks the 'one shift per step' rule.
Cetking shortcut: Keep the symbols that stay still from E (bottom row ★ ↑ =, △ top-left, ○ middle-left); only figures 2 and 4 keep them, and 4 shows the one-symbol shift.
Answer: D
Given below are two sets of figures, namely, Problem Figures, named A, B, C, D and E and Answer figures, numbered as 1, 2, 3, 4 and 5 respectively. Choose the option from the Answer Figure that shall best continue the relationship as is depicted in the Problem Figures.
- A1
- B2
- C3
- D4
- E5
Show answerHide answer
Answer: E ✓ official key
Approach: Compare the four triangular sections (top, right, bottom, left) of each figure.
Solution:
A: top ●, right △, bottom □, left +.
B: top ●, right +, bottom □, left △.
C: top □, right +, bottom ●, left △.
D = A and E = B → the cycle is A, B, C.
So the next figure = C: top □, right +, bottom ●, left △ → figure 5.
Why the other options are wrong:
1: □ on the left, △ at the bottom.
2: same as D (A).
3: + on top.
4: □ on top but △ on the right and + on the left (mirror of C).
Answer: E
Given below are two sets of figures, namely, Problem Figures, named A, B, C, D and E and Answer figures, numbered as 1, 2, 3, 4 and 5 respectively. Choose the option from the Answer Figure that shall best continue the relationship as is depicted in the Problem Figures.
- A1
- B2
- C3
- D4
- E5
Show answerHide answer
Answer: B ✓ official key
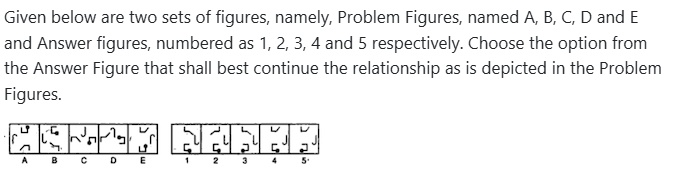
Approach: Look for a figure that repeats.
Solution:
A: notched shape pointing up, arrow on the right going down.
B: chevron pointing right, arrow at the bottom going right.
C and D: further variants.
E is identical to A → cycle of 4 (A, B, C, D).
Next = B: right-pointing chevron with the arrow at the bottom going right → figure 2.
Why the other options are wrong:
1: flag-shaped outline, not B's chevron.
3, 4, 5: hourglass shapes that never appear in the cycle (3 and 4 also turn the arrow the wrong way).
Answer: B
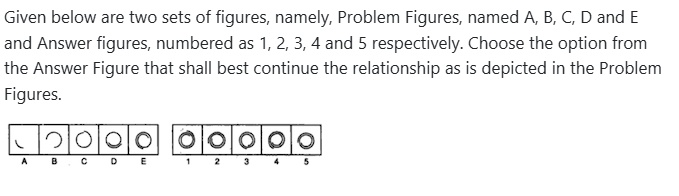
Given below are two sets of figures, namely, Problem Figures, named A, B, C, D and E and Answer figures, numbered as 1, 2, 3, 4 and 5 respectively. Choose the option from the Answer Figure that shall best continue the relationship as is depicted in the Problem Figures.
- A1
- B2
- C3
- D4
- E5
Show answerHide answer
Answer: E ✓ official key
Approach: Track the loops and the shading separately.
Solution:
Loops: bottom (A) → right (B) → top (C) → left (D) → bottom (E) → right next (90° anticlockwise each step). Options left: 2, 3, 5.
Shading: the hourglass turns 90° clockwise each step (A's dark upper-left half becomes B's dark upper half of the right triangle).
E is like A, so the next figure is like B: the dark shading sits in the upper half of the right (looped) triangle, and the lower half of that triangle is white → figure 5.
Why the other options are wrong:
1, 4: loops on the left.
2: grey (not black) in the upper right triangle; the shading follows a whole-figure anticlockwise turn.
3: the dark part is in the lower half of the right triangle.
Answer: E
Given below are two sets of figures, namely, Problem Figures, named A, B, C and D and Answer figures, numbered as 1, 2, 3, 4 and 5 respectively. Choose the option from the Answer Figure that shall best continue the relationship as is depicted in the Problem Figures.
- A1
- B2
- C3
- D4
- E5
Show answerHide answer
Answer: E ✓ official key
Approach: Follow how the Z's strokes change, one at a time.
Solution:
A: Z with small end-ticks.
B: the right tick folds into a short middle bar.
C: the diagonal shortens to the centre and a vertical drops from it.
D: the bottom bar returns from that vertical, so the lower part becomes a box.
Next: the remaining slanted stroke straightens and the left tick extends down. This gives a closed '6'-like shape made only of horizontal and vertical lines → figure 5.
Why the other options are wrong:
1, 2, 3, 4: each still has a slanted stroke, which the series has been removing.
Answer: E
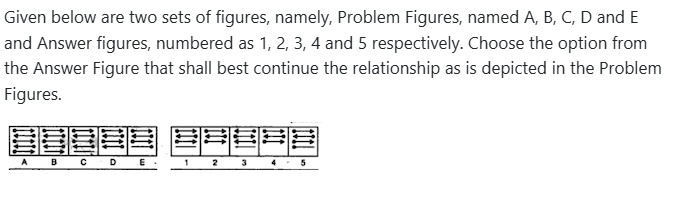
Given below are two sets of figures, namely, Problem Figures, named A, B, C, D and E and Answer figures, numbered as 1, 2, 3, 4 and 5 respectively. Choose the option from the Answer Figure that shall best continue the relationship as is depicted in the Problem Figures.
- A1
- B2
- C3
- D4
- E5
Show answerHide answer
Answer: B ✓ official key
Approach: Track two lines you can recognise: the ball-ended line and the triangle-ended line.
Solution:
Ball line row: 1 → 2 → 4 → 1 → 3 (moves down 1, 2, 1, 2 rows, wrapping round) → next row 4. Its ball points right, right, left, left, right → right next.
Triangle line row: 3 → 4 → 2 → 3 → 1 (same moves) → next row 2, with the triangle on the left.
So the next figure has the triangle on the left in row 2 and the ball on the right in row 4. Of the options that fit, only 2 has the top line bending down at its right end, as the cycle needs → figure 2.
Why the other options are wrong:
3: open arrowhead instead of a triangle.
4: row 3 carries a forked end.
1, 5: the top line's end bends the wrong way.
Answer: B
Given below are two sets of figures, namely, Problem Figures, named A, B, C, D and E and Answer figures, numbered as 1, 2, 3, 4 and 5 respectively. Choose the option from the Answer Figure that shall best continue the relationship as is depicted in the Problem Figures.
- A1
- B2
- C3
- D4
- E5
Show answerHide answer
Answer: C ✓ official key
Approach: Look at the outer lines and the shaded sectors separately.
Solution:
Outer line pair: top (A, B) → right (C, D) → bottom (E) → stays at the bottom next (each side is used twice). Every option fits this, so the shading decides.
Shading in the 8-sector square grows from figure to figure and is carried forward from E. The next figure must keep E's shaded block and add the next sector, giving one solid block from the top-left through the left side, as in figure 3.
Why the other options are wrong:
1, 2, 4, 5: the shaded sectors are split up or in the wrong places compared with the block that has been growing.
Answer: C
Given below are two sets of figures, namely, Problem Figures, named A, B, C, D and E and Answer figures, numbered as 1, 2, 3, 4 and 5 respectively. Choose the option from the Answer Figure that shall best continue the relationship as is depicted in the Problem Figures.
- A1
- B2
- C3
- D4
- E5
Show answerHide answer
Answer: C ✓ official key
Approach: Count the lines and dots, and note which way the curls face.
Solution:
(Lines, dots): A (1,1), B (1,2), C (2,2), D (2,3), E (3,3) → next (3,4).
Each time a dot is added, the figure flips left-right (A→B, C→D), so E→F flips: curls move to the left end and the bracket ticks to the right end.
Dots: below, below, above, above, below → below next.
3 lines, 4 dots below, curls on the left, ticks pointing up on the right → figure 3.
Why the other options are wrong:
1: line ends are turned the wrong way.
2, 4: dots on top (4 also has 3 dots).
5: lines flipped upside down.
Answer: C
Given below are two sets of figures, namely, Problem Figures, named A, B, C, D and E and Answer figures, numbered as 1, 2, 3, 4 and 5 respectively. Choose the option from the Answer Figure that shall best continue the relationship as is depicted in the Problem Figures.
- A1
- B2
- C3
- D4
- E5
Show answerHide answer
Answer: B ✓ official key
Approach: Label the 6 positions TL, TR, ML, MR, BL, BR and track each symbol.
Solution:
A→B: ○ TR→MR, □ MR→ML, pin ML→TL, = TL→BL, × BL→BR, ★ drops out, new S at TR.
The same path TR→MR→ML→TL→BL→BR→out holds for B→C, C→D and D→E.
From E: + TR→MR, △ MR→ML, C ML→TL, S TL→BL, ○ BL→BR, □ drops out, new symbol at TR.
Next: TL C, TR new, ML △, MR +, BL S, BR ○ → figure 2.
Why the other options are wrong:
1: ○ in ML and □, △ at the bottom.
3: □ at TL and C at BL.
4: △ at TL and S at BR.
5: + at TL and □ at BL.
Cetking shortcut: Check just two corners: TL must be C (from ML) and BR must be ○ (from BL). Only figure 2 has both.
Answer: B
Given below are two sets of figures, namely, Problem Figures, named A, B, C, D and E and Answer figures, numbered as 1, 2, 3, 4 and 5 respectively. Choose the option from the Answer Figure that shall best continue the relationship as is depicted in the Problem Figures.
- A1
- B2
- C3
- D4
- E5
Show answerHide answer
Answer: A ✓ official key
Approach: Track the arrow and the S separately.
Solution:
Arrow position: right, left, centre, right, left → centre next. Direction: ↑ ↓ ↓ ↓ ↑ → ↑ next (it points up again after E).
S position: middle, bottom-left, top-right, middle, bottom-left → top-right next.
S tilt: tilted, upright, tilted, upright, tilted → upright next.
Next: up arrow in the centre, upright S at top-right → figure 1.
Why the other options are wrong:
2, 5: arrow points down.
3: S is mirrored.
4: S is drawn upside down rather than in the upright form used in B and D.
Answer: A
Given below are two sets of figures, namely, Problem Figures, named A, B, C, D and E and Answer figures, numbered as 1, 2, 3, 4 and 5 respectively. Choose the option from the Answer Figure that shall best continue the relationship as is depicted in the Problem Figures.
- A1
- B2
- C3
- D4
- E5
Show answerHide answer
Answer: A ✓ official key
Approach: Track the dot-ended element first, then check the other two.
Solution:
Dot-ended element: the dot points up (A), right (B), down (C), left (D), up (E). It turns 90° clockwise each step, so next it points right. Options 1, 2 and 4 show the bottom element with the dot on the right.
The step-shaped and hook-shaped elements also turn 90° and move round. Applying one more turn to E gives a step at the top falling to the right and a hook at the right curling at the bottom → figure 1.
Why the other options are wrong:
3, 5: dot element faces left.
4: top and right elements are copied from E without turning.
2: the top step rises instead of falling.
Answer: A
Given below are two sets of figures, namely, Problem Figures, named A, B, C, D and E and Answer figures, numbered as 1, 2, 3, 4 and 5 respectively. Choose the option from the Answer Figure that shall best continue the relationship as is depicted in the Problem Figures.
- A1
- B2
- C3
- D4
- E5
Show answerHide answer
Answer: A ✓ official key
Approach: Watch the bottom arrow change in each figure.
Solution:
A: 5 complete arrows.
B: 5th arrow loses its tail dot.
C: 5th loses its head (plain line).
D: 5th line removed.
E: 4th arrow (←) loses its head, keeping the dot.
Next: the 4th loses its dot → a plain line under 3 complete arrows (→, ←, →) → figure 1.
Why the other options are wrong:
2, 4: the 4th line is removed too early.
3: the arrow directions are reversed.
5: the 4th line still has its dot.
Answer: A
Given below are two sets of figures, namely, Problem Figures, named A, B, C, D and E and Answer figures, numbered as 1, 2, 3, 4 and 5 respectively. Choose the option from the Answer Figure that shall best continue the relationship as is depicted in the Problem Figures.
- A1
- B2
- C3
- D4
- E5
Show answerHide answer
Answer: B ✓ official key
Approach: Track the length of the curve and where its free end sits.
Solution:
A: quarter arc. B: about three-quarters of a circle. C: a full circle and a bit more. D and E: the curve keeps coiling inside, adding the same arc (about half a turn) each step.
The next figure adds another half turn past E's end and keeps the same direction of coiling → figure 2.
Why the other options are wrong:
1, 3, 4, 5: the free end stops short, goes past the required point, or the spiral coils the other way.
Answer: B
Given below are two sets of figures, namely, Problem Figures, named A, B, C, D and E and Answer figures, numbered as 1, 2, 3, 4 and 5 respectively. Choose the option from the Answer Figure that shall best continue the relationship as is depicted in the Problem Figures.
- A1
- B2
- C3
- D4
- E5
Show answerHide answer
Answer: A ✓ official key
Approach: Track each symbol round the 8 border cells in the anticlockwise order TL → ML → BL → BM → BR → MR → TR → TM.
Solution:
×: TM → TL (1) → BL (2) → BM (1) → MR (2) → next 1 step → TR.
○: ML → BM (2) → BR (1) → TR (2) → next 1 step → TM.
★: ML → BL (1) → BR (2) → next 1 step → MR.
S: BM → next 1 step → BR; □ stays at TL, and the new symbol ↑ enters at ML.
Next: □ ○ × on the top row, ↑ middle-left, ★ middle-right, S bottom-right → figure 1.
Why the other options are wrong:
2, 3, 5: ○ × ★ are shifted one cell along the top row.
4: × at TL and S at TR.
Answer: A
Given below are two sets of figures, namely, Problem Figures, named A, B, C, D and E and Answer figures, numbered as 1, 2, 3, 4 and 5 respectively. Choose the option from the Answer Figure that shall best continue the relationship as is depicted in the Problem Figures.
- A1
- B2
- C3
- D4
- E5
Show answerHide answer
Answer: D ✓ official key
Approach: Check orientation, loop shape and loop size separately.
Solution:
Orientation: A and B face the same way, C and D are their mirror image, E is turned again → the next figure faces the same way as E: stem on the right, arm at the top going left, loop at the bottom-left. Options left: 2, 4.
Loop shape: square, round, square, round, square → round next.
Loop size: small, big, big, small, small → big next.
Big semicircle at the bottom-left with the stem on the right → figure 4.
Why the other options are wrong:
1, 3, 5: stem on the left with the arm going right (wrong orientation).
2: correct orientation but the loop is small.
Answer: D
Given below are two sets of figures, namely, Problem Figures, named A, B, C, D and E and Answer figures, numbered as 1, 2, 3, 4 and 5 respectively. Choose the option from the Answer Figure that shall best continue the relationship as is depicted in the Problem Figures.
- A1
- B2
- C3
- D4
- E5
Show answerHide answer
Answer: A ✓ official key
Approach: Compare pairs: A→B, C→D, E→F.
Solution:
A: bottom strip black → B: top strip black (flipped upside down).
C: black at the bottom with a slanted edge → D: the same fill flipped to the top.
E: black fills most of the box from the bottom, edge slanting down to the right, top strip white.
Next = E flipped upside down: black from the top, edge slanting up to the right, one full white strip at the bottom → figure 1.
Why the other options are wrong:
2: too little black (two white strips).
3: the slant runs the wrong way.
4, 5: no full white strip at the bottom.
Answer: A
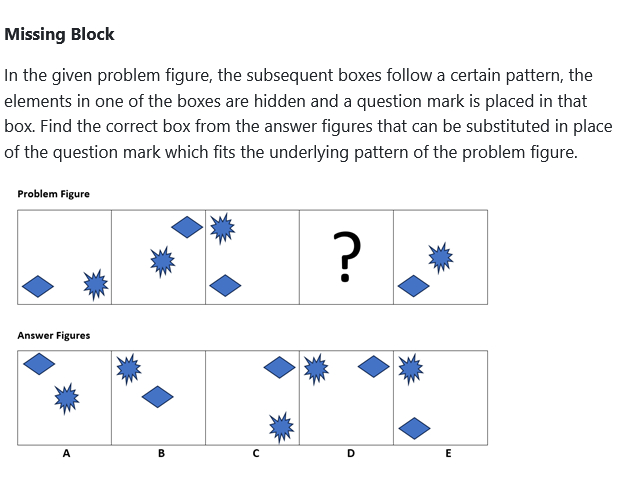
Missing Block
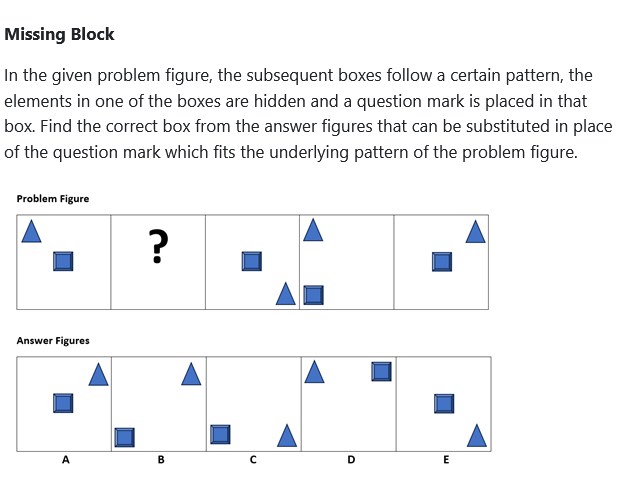
In the given problem figure, the subsequent boxes follow a certain pattern, the elements in one of the boxes are hidden and a question mark is placed in that box. Find the correct box from the answer figures that can be substituted in place of the question mark which fits the underlying pattern of the problem figure.
- AA
- BB
- CC
- DD
- EE
Show answerHide answer
Official CET key: C · Cetking's answer: E — see why below
Approach: Track each shape across the five boxes separately.
Solution:
Diamond: bottom-left, top-right, bottom-left, ?, bottom-left → it alternates, so box 4 has it at top-right.
Star: bottom-right, centre, top-left, ?, centre → it alternates between a corner and the centre, the corners going bottom-right, top-left, bottom-right → box 4 has it at bottom-right.
Option C: diamond top-right, star bottom-right ✓.
Why the other options are wrong:
A, B, E: diamond not at top-right. D: star at top-left.
Cetking shortcut: The diamond's simple alternation leaves C or D; the star's corner pattern decides.
Answer: C
Missing Block
In the given problem figure, the subsequent boxes follow a certain pattern, the elements in one of the boxes are hidden and a question mark is placed in that box. Find the correct box from the answer figures that can be substituted in place of the question mark which fits the underlying pattern of the problem figure.
- AA
- BB
- CC
- DD
- EE
Show answerHide answer
Official CET key: B · Cetking's answer: A — see why below
Approach: Track the triangle and the square separately.
Solution:
Square: centre, ?, centre, bottom-left, centre → it alternates between the centre and the bottom-left corner → box 2: bottom-left.
Triangle: top-left, ?, bottom-right, top-left, top-right → it repeats a 3-step cycle top-left → top-right → bottom-right → box 2: top-right.
Option B: triangle top-right, square bottom-left ✓.
Why the other options are wrong:
A, E: square at the centre. C: triangle bottom-right. D: triangle top-left, square top-right.
Answer: B
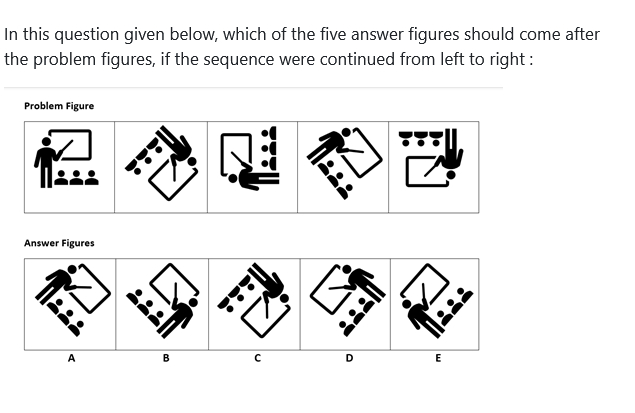
In this question given below, which of the five answer figures should come after the problem figures, if the sequence were continued from left to right :
- AA
- BB
- CC
- DD
- EE
Show answerHide answer
Official CET key: E · Cetking's answer: C — see why below
Approach: Measure the turn between consecutive figures.
Solution:
Each figure is the previous one turned through the same angle, 135° clockwise (teacher, board and students move together).
Figure 1 upright → 2 → 3 → 4 → 5 each step +135°.
Turn figure 5 another 135° clockwise → option E.
Why the other options are wrong:
A, C: turned by the wrong angle. B, D: mirror images — the teacher and students are on swapped sides, which no rotation gives.
Cetking shortcut: Follow one landmark (the board) — it moves 135° clockwise every step; first discard options where teacher and students are on swapped sides (mirrors).
Answer: E
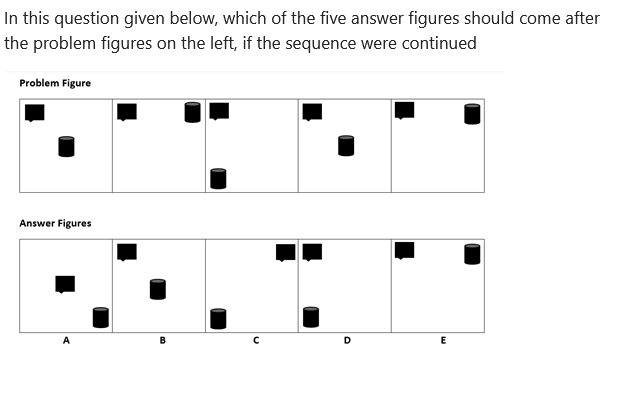
In this question given below, which of the five answer figures should come after the problem figures on the left, if the sequence were continued
- AA
- BB
- CC
- DD
- EE
Show answerHide answer
Answer: D ✓ official key
Approach: Track the speech bubble and the cylinder separately.
Solution:
Speech bubble: stays in the top-left corner in every figure.
Cylinder: centre → top-right → bottom-left → centre → top-right → so the cycle repeats every 3 figures.
Next: cylinder at bottom-left, bubble at top-left → option D.
Why the other options are wrong:
A: bubble moved to the centre. B: cylinder at the centre. C: bubble at top-right. E: repeats figure 5.
Answer: D
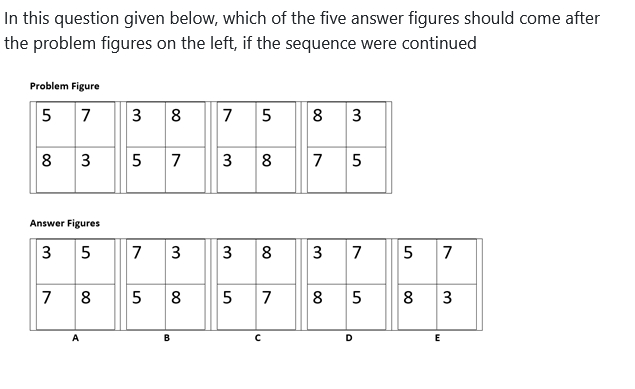
In this question given below, which of the five answer figures should come after the problem figures on the left, if the sequence were continued
- AA
- BB
- CC
- DD
- EE
Show answerHide answer
Answer: E ✓ official key
Approach: Write each 2×2 grid as [top row / bottom row] and compare consecutive grids.
Solution:
Fig 1: [5 7 / 8 3] → Fig 2: [3 8 / 5 7]
Rule: new top row = old bottom row reversed; new bottom row = old top row.
Check: Fig 2 → Fig 3: top = (5 7) reversed = 7 5; bottom = 3 8 → [7 5 / 3 8] ✓
Fig 3 → Fig 4: top = (3 8) reversed = 8 3; bottom = 7 5 → [8 3 / 7 5] ✓
Fig 5: top = (7 5) reversed = 5 7; bottom = 8 3 → [5 7 / 8 3] = option E.
Cetking shortcut: Each number moves one place along the cycle top-left → bottom-left → top-right → bottom-right → top-left, so after 4 steps the grid returns to figure 1.
Answer: E
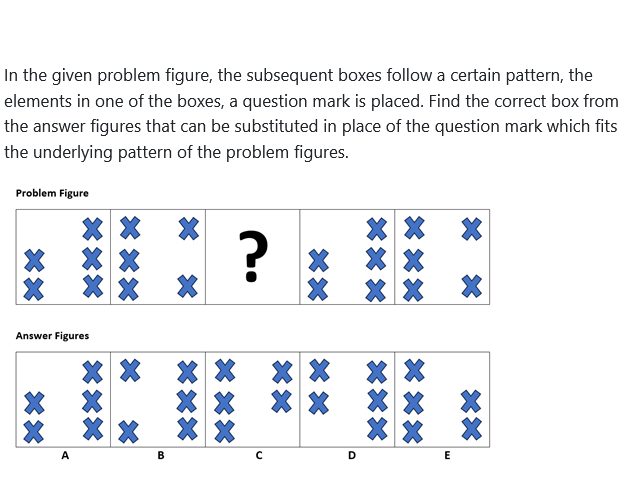
In the given problem figure, the subsequent boxes follow a certain pattern, the elements in one of the boxes, a question mark is placed. Find the correct box from the answer figures that can be substituted in place of the question mark which fits the underlying pattern of the problem figures.
- AA
- BB
- CC
- DD
- EE
Show answerHide answer
Official CET key: D · Cetking's answer: C — see why below
Approach: Treat each box as a 3-row × 2-column grid of six cells and find the empty cell.
Solution:
Each box has 5 crosses and one empty cell.
Box 1: empty = left-top. Box 2: empty = right-middle. Box 4 = box 1, box 5 = box 2, so the cycle has length 3.
The empty cell moves one row down each step while switching sides: left-top → right-middle → left-bottom → (repeat).
Box 3: crosses in left-top, left-middle and all three right cells; left-bottom empty → option D.
Why the other options are wrong:
A: repeats box 1. B: empty cell left-middle. C: empty right-bottom. E: empty right-top.
Answer: D
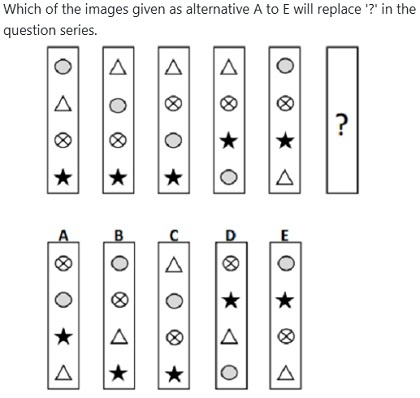
Which of the images given as alternative A to E will replace '?' in the question series.
- AA
- BB
- CC
- DD
- EE
Show answerHide answer
Official CET key: A · Cetking's answer: D — see why below
Approach: Track the order of the four symbols – one swap happens at each step.
Solution: Write top to bottom (O = grey circle, T = triangle, X = crossed circle, S = star).
Fig 1: O T X S → Fig 2: T O X S (swap positions 1–2) → Fig 3: T X O S (swap 2–3) → Fig 4: T X S O (swap 3–4) → Fig 5: O X S T (swap 4–1).
Next swap repeats the cycle (positions 1–2): X O S T.
Option A shows X, O, S, T from top to bottom.
Why the other options are wrong: The swaps run 1-2, 2-3, 3-4, 4-1 and then repeat, so the next swap is 1-2; B, C, D and E come from other swaps of O X S T.
Cetking shortcut: Look for one pair changing places between figures, and note which pair moves next.
Answer: A
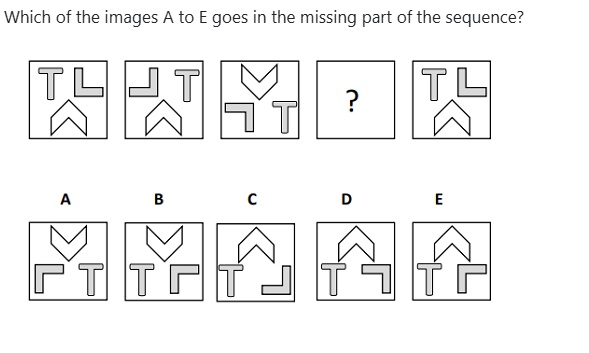
Which of the images A to E goes in the missing part of the sequence?
- AA
- BB
- CC
- DD
- EE
Show answerHide answer
Answer: B ✓ official key
Approach: Two operations take turns: (i) swap T and L and mirror the L; (ii) flip the figure top-to-bottom.
Solution: Fig 1 → Fig 2: T and L swap places and the L is mirrored (chevron unchanged).
Fig 2 → Fig 3: the figure is flipped top-to-bottom (chevron points down at the top, L becomes ┐ at bottom-left, T at bottom-right).
Fig 3 → ?: apply (i) again – T moves to bottom-left, the L moves to bottom-right and is mirrored to ┌; chevron stays at the top pointing down.
? → Fig 5: applying (ii) gives back Fig 1 ✔.
Option B matches.
Why the other options are wrong: A keeps ┌ on the left (no swap); C, D and E have the chevron pointing up, so the flip has already happened.
Cetking shortcut: Use the last figure as a check: the missing figure must lead back to Fig 5.
Answer: B
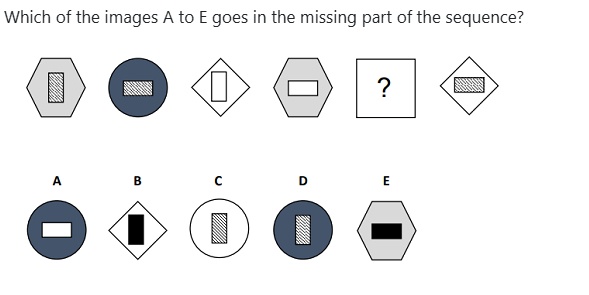
Which of the images A to E goes in the missing part of the sequence?
- AA
- BB
- CC
- DD
- EE
Show answerHide answer
Official CET key: D · Cetking's answer: C — see why below
Approach: Track three things separately: outer shape, inner rectangle orientation, inner shading.
Solution: Outer shape cycle: hexagon → circle → diamond → hexagon → circle → diamond.
Inner rectangle: vertical, horizontal, vertical, horizontal → vertical → horizontal.
Inner shading in pairs: hatched, hatched, white, white → hatched, hatched.
So ? = dark circle with a vertical hatched rectangle = D.
Why the other options are wrong: A has a horizontal white rectangle; B and E have the wrong outer shape and a black inner; C has a white circle (the circle in this series is dark).
Cetking shortcut: Split the figure into features and run a separate cycle for each.
Answer: D
In the question given below which one of the answer figures should come after the problem figures given, if the sequence were continued?
- A1
- B2
- C3
- D4
- E5
Show answerHide answer
Official CET key: C · Cetking's answer: B — see why below
Approach: Alternate steps: the figure detaches from the dots and turns 180°, then a new figure attaches.
Solution: A: a 3-line shape is attached to 3 dots at the top. B: the same shape turns 180° (∨ → ∧), drops away from the dots and the dots stay at the top.
C: a 2-line '<' is attached to 2 dots on the right.
So D: the '<' turns 180° into '>' and moves away from the dots; the 2 dots stay on the right (top and bottom).
Option 3 shows '>' with 2 dots on the right.
Why the other options are wrong: 1 keeps a third line (stem); 2 has 3 dots; 4 and 5 keep '<' without the 180° turn.
Cetking shortcut: Match element counts first (2 lines, 2 dots) – this leaves only 3 and 4.
Answer: C
In the question given below which one of the answer figures should come after the problem figures given, if the sequence were continued ?
- A1
- B2
- C3
- D4
- E5
Show answerHide answer
Answer: B ✓ official key
Approach: The two elements swap places and swap single/double outlines at each step.
Solution: A: double circle at top-left, single ∧ at bottom-right.
B: the elements swap places (∧ to top-left, circle to bottom-right) and the outlines swap (∧ becomes double, circle becomes single).
C: single arc at top-left, double square at bottom-right.
So D: the square goes to top-left as a single outline, the arc goes to bottom-right as a double arc.
Option 2 matches.
Why the other options are wrong: 1 and 3 do not swap places; 4 keeps the square double; 5 puts the double square at the top and the arc single.
Cetking shortcut: Two rules – position swap and single/double swap – check both.
Answer: B
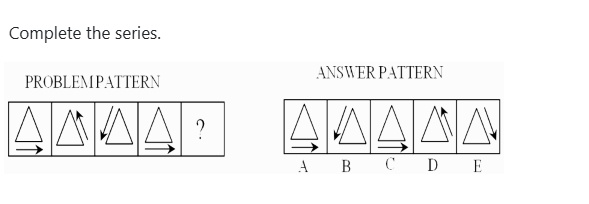
Complete the series.
- AA
- BB
- CC
- DD
- EE
Show answerHide answer
Official CET key: D · Cetking's answer: A — see why below
Approach: The arrow moves along the sides of the triangle in a fixed cycle.
Solution: Fig 1: arrow along the base pointing right.
Fig 2: arrow along the right side pointing up.
Fig 3: arrow along the left side pointing down.
Fig 4: back to the base pointing right – a cycle of 3 (base → right side up → left side down).
Fig 5 = Fig 2: arrow along the right side pointing up = D.
Why the other options are wrong: A and C repeat the base arrow; B shows the left-side position, which comes after the right side; E has the right-side arrow pointing down.
Cetking shortcut: Find the cycle length (3) and repeat: the 5th figure = the 2nd figure.
Answer: D
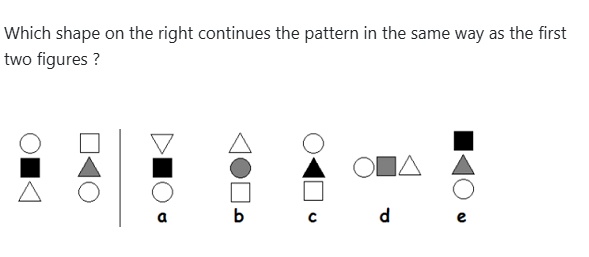
Which shape on the right continues the pattern in the same way as the first two figures ?
- Aa
- Bb
- Cc
- Dd
- Ee
Show answerHide answer
Answer: B ✓ official key
Approach: The three shapes move up one place (cyclically) and only the middle shape is shaded.
Solution: Fig 1 (top to bottom): circle, black square, triangle.
Fig 2: square, grey triangle, circle – every shape moved up one place, the top one went to the bottom, and the middle shape is shaded.
Next: triangle, shaded circle, square.
Option b: triangle, grey circle, square ✔.
Why the other options are wrong: a has an inverted triangle at the top and the wrong order; c has circle at the top; d is horizontal; e is the reverse order with the top shape shaded.
Cetking shortcut: Track only the top shape: circle → square → triangle; then check that the middle shape is filled.
Answer: B
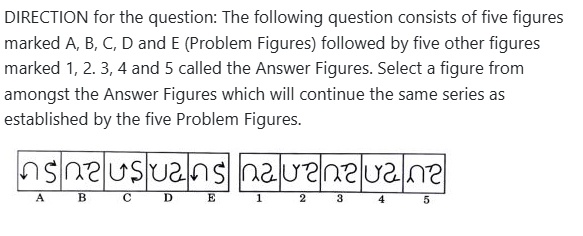
The question consists of five figures. A, B, C, D and E are called problem figures, followed by five figures marked 1, 2, 3, 4 and 5 called the answer figures. Select a figure from among answer figures which will continue the same series as established by the five problem figures.
- A1
- B2
- C3
- D4
- E5
Show answerHide answer
Official CET key: D · Cetking's answer: A — see why below
Approach: Three linked rules: outer shape becomes inner, the stick's head becomes the new outer shape, and the stick turns 90° clockwise.
Solution: A → B: hexagon (outer) goes inside, the square head of the stick becomes the outer square; the stick turns 90° clockwise (vertical on the right → horizontal at the top).
B → C: square goes inside, arrow head (triangle) becomes the outer triangle. C → D and D → E follow the same rule.
E: outer house shape, stick on the right with a round head at the top.
Next: the house goes inside, the round head becomes the outer circle, and the stick moves to the top (horizontal) with a new head at the right end.
Option 4 matches.
Why the other options are wrong: 5 keeps the house as the outer shape; 1 has a square inside; 2 has a trapezium outside; 3 has the head at the wrong end.
Cetking shortcut: Use the outer shape first: it must be a circle (E's stick head) with a house inside – only 3 and 4; then check the stick direction.
Answer: D
DIRECTION for the question: The following question consists of five figures marked A, B, C, D and E (Problem Figures) followed by five other figures marked 1, 2. 3, 4 and 5 called the Answer Figures. Select a figure from amongst the Answer Figures which will continue the same series as established by the five Problem Figures.
- A1
- B2
- C3
- D4
- E5
Show answerHide answer
Answer: A ✓ official key
Approach: Figure series — two changes at once: the flag-stick rotates 90° clockwise each step, and the count goes 1, 1, 2, 2, 3, 3.
Solution:
A: 1 vertical stick, flag at top. B: 1 horizontal stick, flag at the right end hanging down (A turned 90° clockwise).
C: 2 sticks, flag at bottom. D: 2 sticks, flag at left. E: 3 sticks, flag at top.
Next: 3 sticks, rotated 90° clockwise from E ⇒ horizontal sticks with the flag at the RIGHT end, hanging below the line — same orientation as B.
Figure 1 shows exactly this.
Why the other options are wrong:
2 and 5: four sticks. 3: flags above the line (wrong orientation). 4: flags placed away from the end / wrong side.
Cetking shortcut: Figures two apart (A, C, E or B, D) are 180° apart; so the next figure copies B's orientation with three sticks.
Answer: A
DIRECTION for the question: The following question consists of five figures marked A, B, C, D and E (Problem Figures) followed by five other figures marked 1, 2. 3, 4 and 5 called the Answer Figures. Select a figure from amongst the Answer Figures which will continue the same series as established by the five Problem Figures.
- A1
- B2
- C3
- D4
- E5
Show answerHide answer
Answer: C ✓ official key
Approach: Figure series with a repeating cycle.
Solution:
Figure E is identical to figure A ⇒ the series repeats every 4 figures: A, B, C, D, A(=E), …
So the next figure must be the same as B.
Answer figure 3 is an exact copy of B (same two symbols, same orientation and hooks).
Why the other options are wrong:
1, 2, 4, 5: each differs from B in the shape or orientation of at least one of the two symbols.
Cetking shortcut: Whenever the last problem figure equals an earlier one, simply copy the figure that came after it.
Answer: C
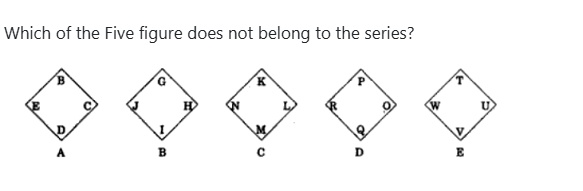
Which of the Five figure does not belong to the series?
- A1
- B2
- C3
- D4
- E5
Show answerHide answer
Answer: D ✓ official key
Approach: Figure series (odd one out) — letters placed clockwise in alphabetical order.
Solution:
A: B (top) → C (right) → D (bottom) → E (left) — clockwise, consecutive.
B: G → H → I → J clockwise.
C: K → L → M → N clockwise.
E: T → U → V → W clockwise.
D: P (top), O (right), Q (bottom), R (left) — clockwise reads P, O, Q, R; for the pattern it should be O, P, Q, R.
So figure D (option 4) does not belong.
Why the other options are wrong:
Figures A, B, C, E all follow the clockwise consecutive order starting from the top.
Cetking shortcut: Read every figure from the top going clockwise — the one that isn't A-B-C-D-like breaks the series.
Answer: D
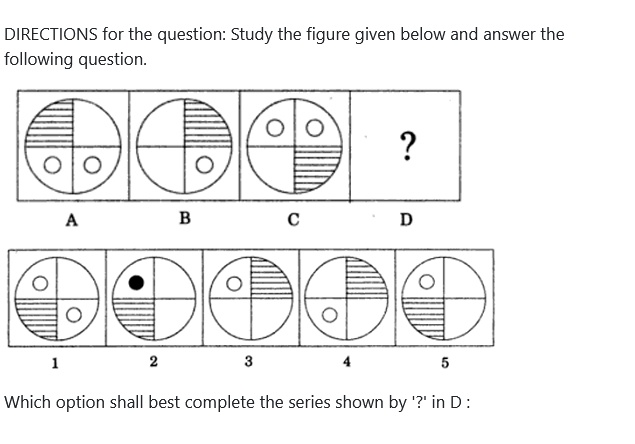
DIRECTIONS for the question: Study the figure given below and answer the following question.
Which option shall best complete the series shown by '?' in D :
- A1
- B2
- C3
- D4
- E5
Show answerHide answer
Answer: E ✓ official key
Approach: Figure series: the shaded quadrant moves clockwise one quadrant per step; the number of small circles alternates 2, 1, 2, 1.
Solution:
Shading: A top-left → B top-right → C bottom-right → D bottom-left.
Circles: A 2 (bottom row) → B 1 → C 2 (top row) → D 1.
The single circle sits in the quadrant just after the shaded one (B: shade top-right, circle bottom-right; D: shade bottom-left, circle top-left).
Figure 5: shade bottom-left, one circle top-left.
Why the other options are wrong:
1: two circles.
2: black circle (colour changed).
3, 4: shading at top-right (not moved).
Cetking shortcut: Fix the shading first (bottom-left) — it removes 3 and 4 at once; then count circles.
Answer: E
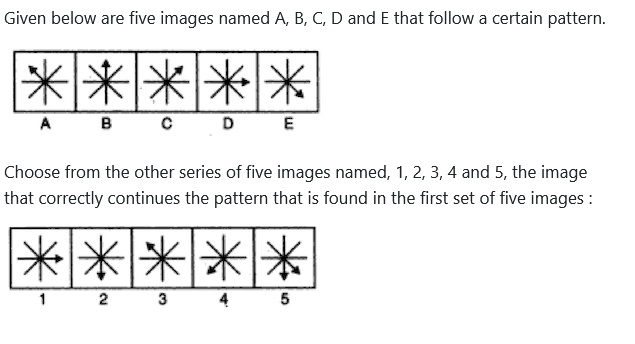
Given below are five images named A, B, C, D and E that follow a certain pattern.
Choose from the other series of five images named, 1, 2, 3, 4 and 5, the image that correctly continues the pattern that is found in the first set of five images :
- A1
- B2
- C3
- D4
- E5
Show answerHide answer
Answer: B ✓ official key
Approach: Figure series: the arrowhead moves 45° clockwise around the 8-spoke star each step.
Solution:
A: north-west → B: north → C: north-east → D: east → E: south-east.
Next: south → figure 2 (arrow pointing down).
Why the other options are wrong:
1: east (repeat of D).
3: north-west (back to A).
4: south-west (90° jump).
5: two arrowheads.
Answer: B
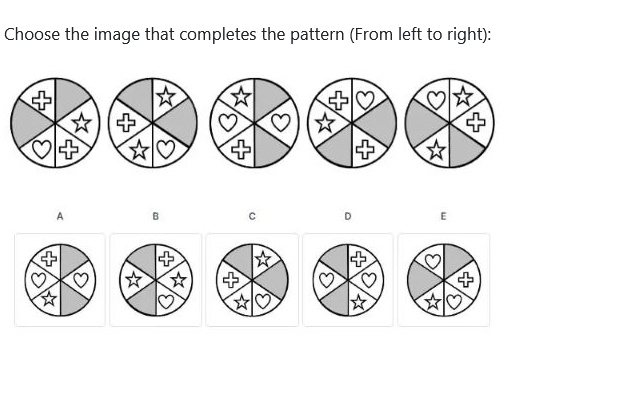
Choose the image that completes the pattern (From left to right):
- AA
- BB
- CC
- DD
- EE
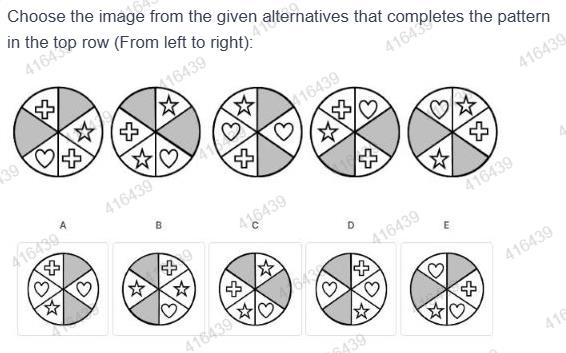
Show answerHide answer
Answer: D ✓ official key
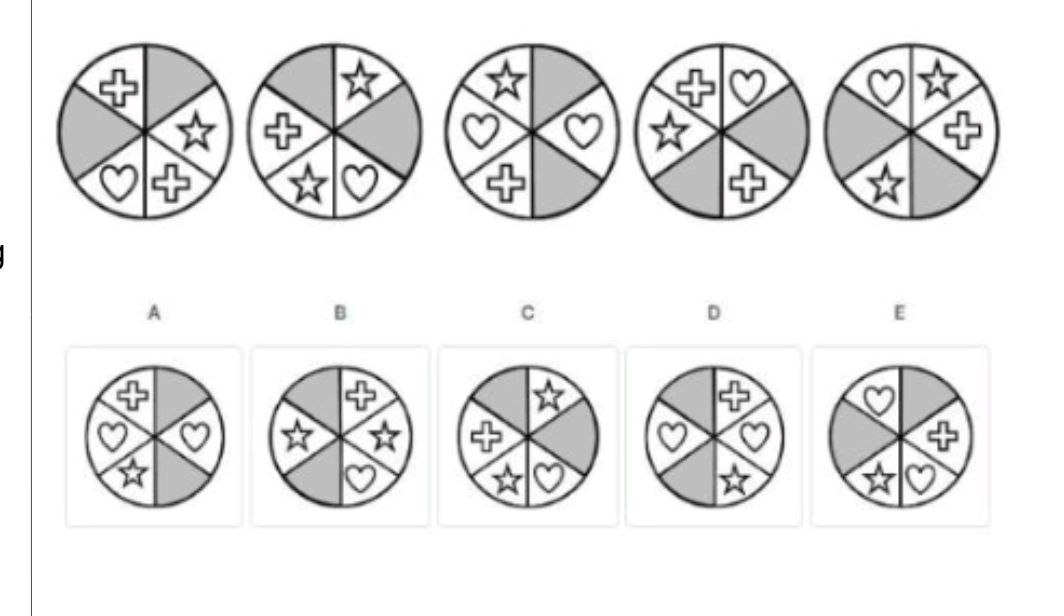
Approach: Figure series in a 6-sector circle: each grey sector moves one sector clockwise per step, and the symbol that appears twice cycles plus → star → heart.
Solution:
Grey sector 1: top-right → right → bottom-right → bottom-left → left → next top-left.
Grey sector 2: left → top-left → top-right → right → bottom-right → next bottom-left.
So figure 6 has grey sectors at top-left and bottom-left → options B or D.
Doubled symbol: fig 1 plus, fig 2 star, fig 3 heart, fig 4 plus, fig 5 star → fig 6 heart.
D has two hearts (plus one plus and one star); B has two stars.
Why the other options are wrong:
A, C, E: grey sectors in the wrong positions.
B: two stars instead of two hearts.
Cetking shortcut: Solve the shading first to cut five options to two, then use the symbol count.
Answer: D
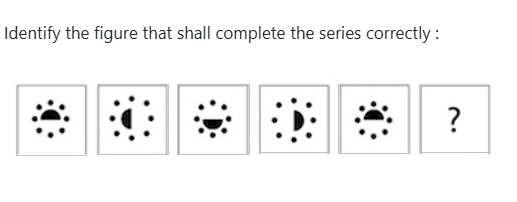
Identify the figure that shall complete the series correctly :
- A
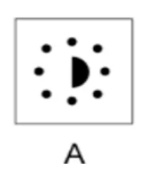
- B
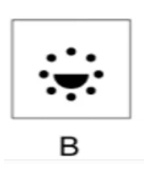
- C
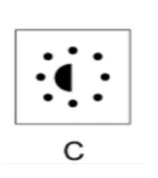
- D
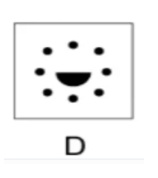
- E
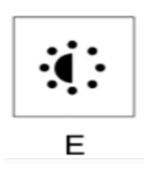
Show answerHide answer
Answer: C ✓ official key
Approach: Figure series — rotation of the black semicircle plus alternating size of the dot ring.
Solution:
The black semicircle turns 90° anticlockwise each step: curve up → curve left → curve down → curve right → curve up.
So figure 6 must have the curve facing left (flat side on the right).
The ring of 8 dots alternates: compact (1, 3, 5) and spread out (2, 4); figure 6 must have the spread ring.
Option C has the left-facing semicircle with the wider dot ring.
Why the other options are wrong:
A: semicircle faces right.
B, D: semicircle faces down.
E: semicircle faces left but with the tight dot ring of figures 1, 3, 5.
Cetking shortcut: Same position as figure 2 is expected (4-step cycle), so the answer must look like figure 2 → C.
Answer: C
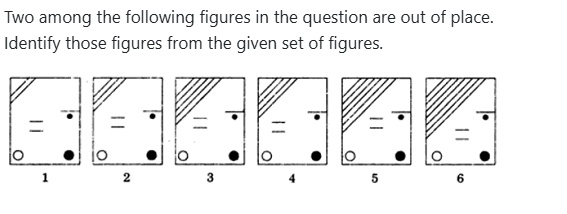
Two among the following figures in the question are out of place.
Identify those figures from the given set of figures.
- A4 and 5
- B1 and 4
- C3 and 4
- D2 and 6
- E3 and 5
Show answerHide answer
Official CET key: C · Cetking's answer: E — see why below
Approach: Figure series (out-of-place figures) — count the hatch lines in the top-left corner.
Solution:
Hatch lines: figure 1 = 2, figure 2 = 3, figure 3 = 5, figure 4 = 4, figure 5 = 6, figure 6 = 7.
The series should increase by one line each step: 2, 3, 4, 5, 6, 7.
Figures 3 and 4 have swapped places (5 before 4).
So figures 3 and 4 are out of place.
Why the other options are wrong:
A 4 and 5, B 1 and 4, D 2 and 6, E 3 and 5: swapping these pairs does not give a clean +1 series.
Cetking shortcut: Count only the changing element (hatch lines); everything else (circles, dots, '=' sign) is constant.
Answer: C
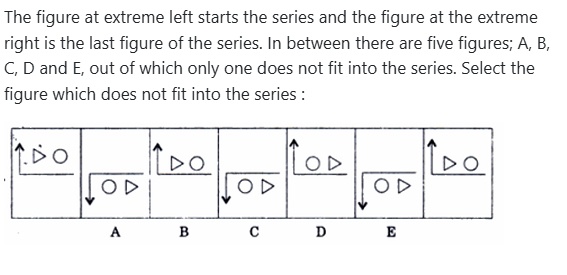
The figure at extreme left starts the series and the figure at the extreme right is the last figure of the series. In between there are five figures; A, B, C, D and E, out of which only one does not fit into the series. Select the figure which does not fit into the series :
- AA
- BB
- CC
- DD
- EE
Show answerHide answer
Answer: D ✓ official key
Approach: Figure series (wrong figure) — alternate pattern of the arrow and the order of the two shapes.
Solution:
Figures alternate between two states.
Arrow up (figures 1, B, D, last): triangle comes first, then circle.
Arrow down (A, C, E): circle comes first, then triangle.
Figure D has the arrow up but shows circle then triangle — it breaks the rule.
Why the other options are wrong:
A, C, E: arrow down with circle–triangle order ✓.
B: arrow up with triangle–circle order ✓.
Cetking shortcut: Compare every alternate figure with the first and last figures, which are given correct.
Answer: D
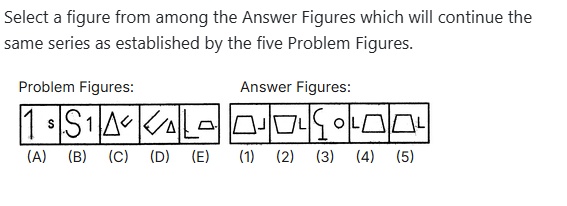
Select a figure from among the Answer Figures which will continue the same series as established by the five Problem Figures.
- A1
- B2
- C3
- D4
- E5
Show answerHide answer
Answer: E ✓ official key
Approach: Figure series — the big and small symbols swap in pairs.
Solution:
(A) big 1, small s → (B) big S, small 1: the two symbols swap size and side.
(C) big triangle, small hook → (D) big hook, small triangle: swap again.
(E) big L, small trapezium → next: big trapezium, small L on the right, both upright.
Answer figure 5 shows a big upright trapezium with a small upright L on its right.
Why the other options are wrong:
1: the small symbol is a reversed L (J).
2: the trapezium is inverted.
3: brings new symbols, breaking the swap.
4: puts the small L on the left.
Cetking shortcut: Spot the swap in A→B and C→D; then figure F is just E with the two symbols swapped.
Answer: E
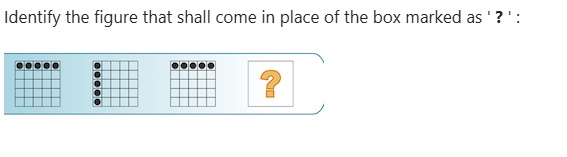
Identify the figure that shall come in place of the box marked as ' ? ' :
- A
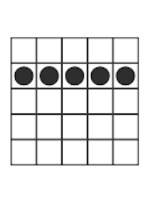
- B
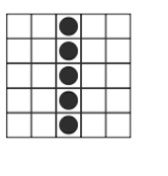
- C
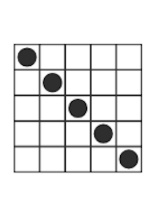
- D
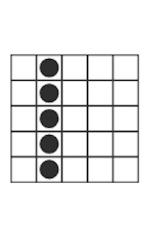
- E
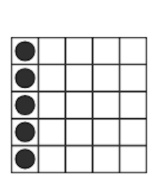
Show answerHide answer
Answer: E ✓ official key
Approach: Figure series — alternating position of the five dots.
Solution:
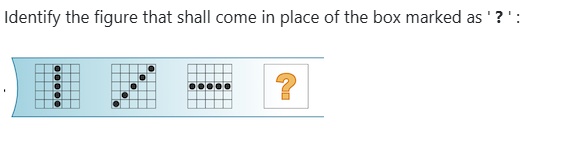
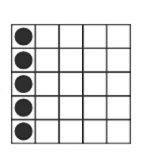
Figure 1: five dots along the top row.
Figure 2: five dots down the left column.
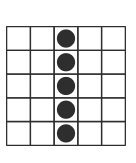
Figure 3: top row again.
Figure 4 must be the left column again.
Why the other options are wrong:
A: dots in the second row.
B, D: dots in a middle/second column.
C: dots along the diagonal.
Cetking shortcut: Alternating series: figure 4 = figure 2.
Answer: E
Identify the figure that shall come in place of the box marked as ' ? ' :
- A
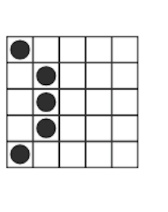
- B
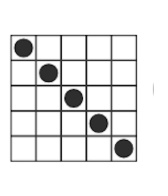
- C
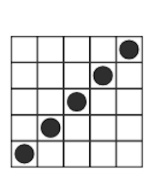
- D
- E
Show answerHide answer
Answer: B ✓ official key
Approach: Figure series — a line of five dots rotating by 45° each step.
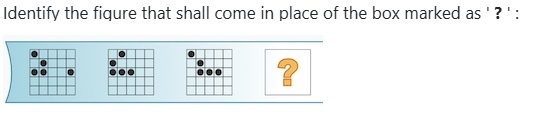
Solution:
Figure 1: vertical line (middle column).
Figure 2: diagonal from bottom-left to top-right (45° clockwise).
Figure 3: horizontal line (middle row) (another 45°).
Figure 4: next 45° turn gives the diagonal from top-left to bottom-right.
Why the other options are wrong:
A: an irregular pattern, not a straight line.
C: the same diagonal as figure 2 (no rotation).
D, E: vertical lines — the line has already passed vertical.
Cetking shortcut: Vertical → / → horizontal → \ : the line is turning like a clock hand.
Answer: B
Identify the figure that shall come in place of the box marked as ' ? ' :
- A
- B
- C
- D
- E
Show answerHide answer
Answer: A ✓ official key
Approach: Figure series — two independent dot groups: an alternating pair and a sliding row of three.
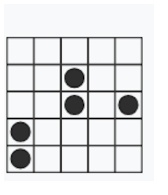
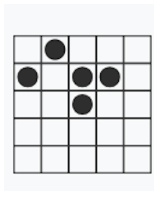
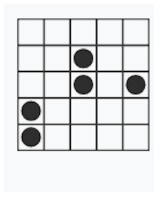
Solution:
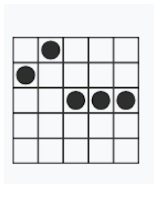
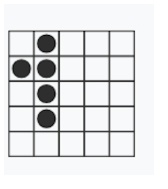
Top two dots alternate: (row 1, col 1)+(row 2, col 2) in figures 1 and 3; (row 1, col 2)+(row 2, col 1) in figure 2. So figure 4 has (row 1, col 2)+(row 2, col 1).
Row-3 block of three dots moves one column right each time (wrapping around): columns 5-1-2 → 1-2-3 → 2-3-4 → next 3-4-5.
Option A: top dots at (1, 2) and (2, 1), row 3 dots at columns 3, 4, 5 ✓.
Why the other options are wrong:
B, C, D, E: either the top pair is wrong or the row of three is not at columns 3–5.
Cetking shortcut: Split the dots into groups and track each group separately.
Answer: A
which shapes come next in the sequence.
- A
- B
- C
- D
- E
Show answerHide answer
Answer: C
Approach: Two-step figure series — vertical figure turns horizontal with one symbol replaced.
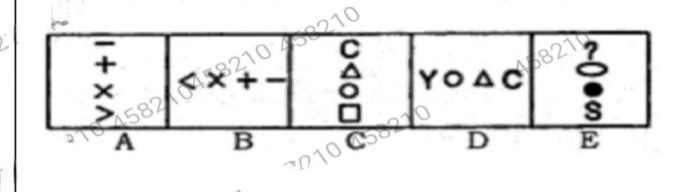
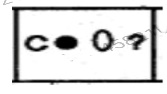
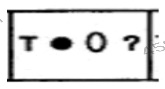
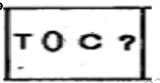
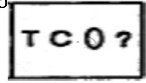
Solution: A (top→bottom): − + × >. B (left→right): < × + −, i.e. A read bottom-up, with the last symbol > replaced by a new one (<).
C: C Δ O □. D: Y O Δ C — again C read bottom-up, with □ replaced by a new symbol Y.
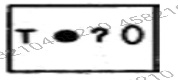
E: ? O ● S. Next figure = E read bottom-up, horizontal, with S replaced by a new symbol: T ● O ?.
Option C shows T ● O ?.
Why the other options are wrong: A has the order T ● ? O; B uses C, an old symbol, instead of a new one; D and E drop the ●.
Cetking shortcut: Figures pair up (A–B, C–D); compare one pair, then apply the same move to E.
Answer: C
which shape comes next in the series
- A
- B
- C
- D
- E
Show answerHide answer
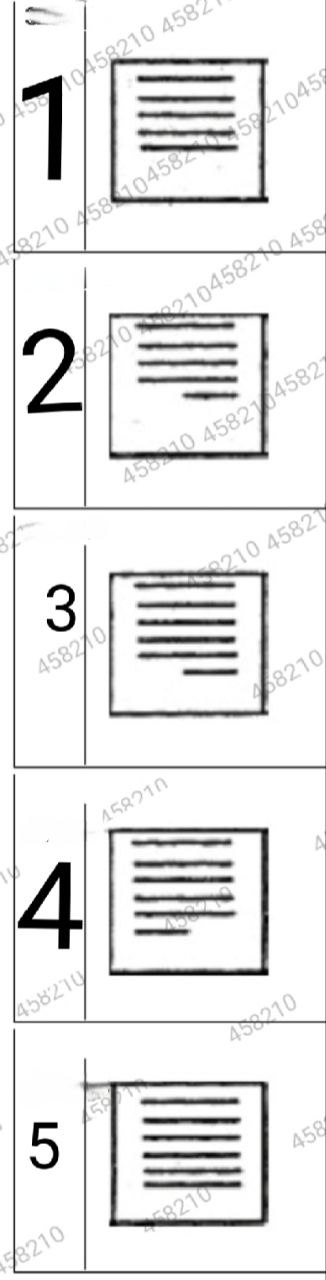
Answer: B
Approach: Figure series — line count grows alternately by ½ and 1, orientation alternates.
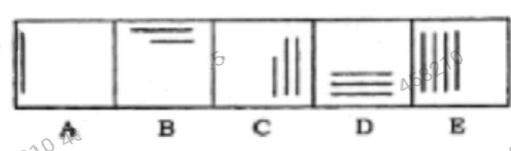
Solution: A: 1 line (vertical). B: 1½ (horizontal). C: 2½ (vertical). D: 3 (horizontal). E: 4 (vertical).
Additions: +½, +1, +½, +1 → next +½ = 4½ lines.
Orientation alternates V, H, V, H, V → next is horizontal.
Option B shows 4 full horizontal lines and a half line.
Why the other options are wrong: A has 5 full lines and no half line; C has 5 full lines and a half line (5½); D has 5 full lines and a half line with the short line on the left; E has 6 full lines.
Cetking shortcut: Count the lines (half line = ½) and write the differences — the alternating +½/+1 jumps out.
Answer: B
select which figure will come in the next following series
- A
- B
- C
- D
- E
Show answerHide answer
Answer: C
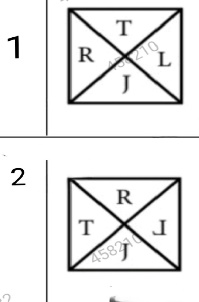
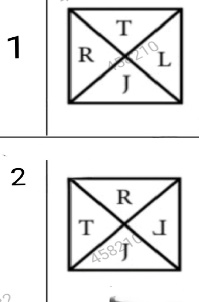
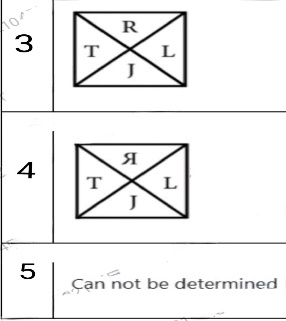
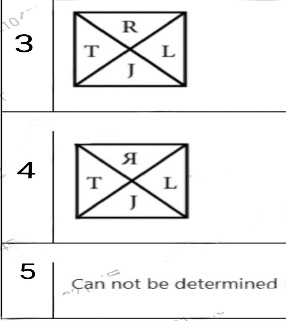
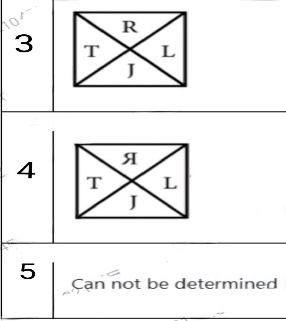
Approach: Rotation series — each letter moves one position clockwise every step.
Solution: Fig 1: R top, L right, J bottom, T left.
Fig 2: T top, R right, L bottom, J left — every letter moved one step clockwise.
Fig 3 and Fig 4 continue the same move.
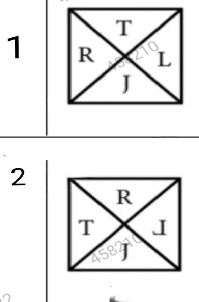
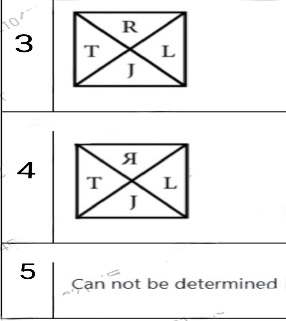
After 4 moves every letter returns to its starting place, so Fig 5 = Fig 1: R top, L right, J bottom, T left, all letters upright.
Option C matches.
Why the other options are wrong: A has T on top; B has L turned sideways and R/T positions changed; D has R mirrored; E says the figure cannot be determined, but the rule fixes it exactly.
Cetking shortcut: Four positions + one step per figure = the pattern repeats every 4 figures; the 5th figure equals the 1st.
Answer: C
complete the series
- A
- B
- C
- D
- E
Show answerHide answer
Answer: D
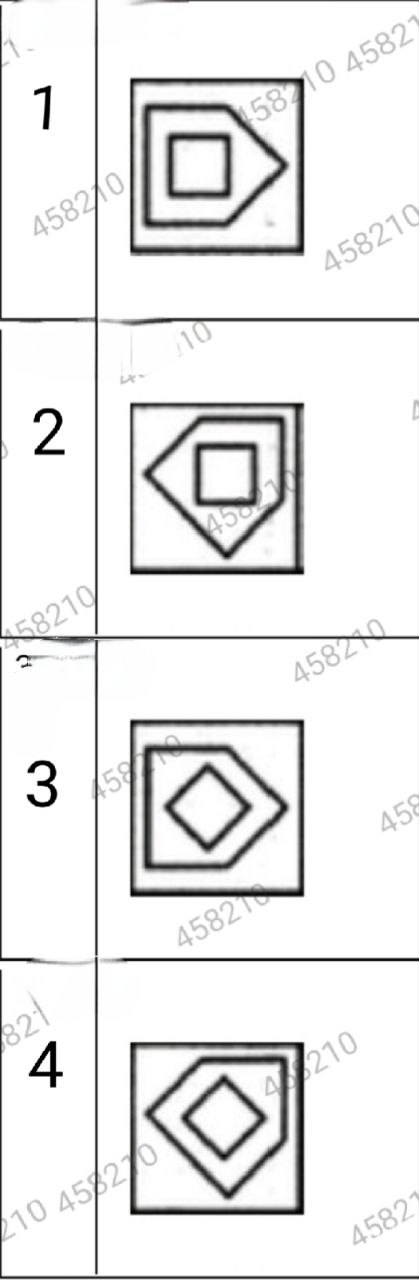
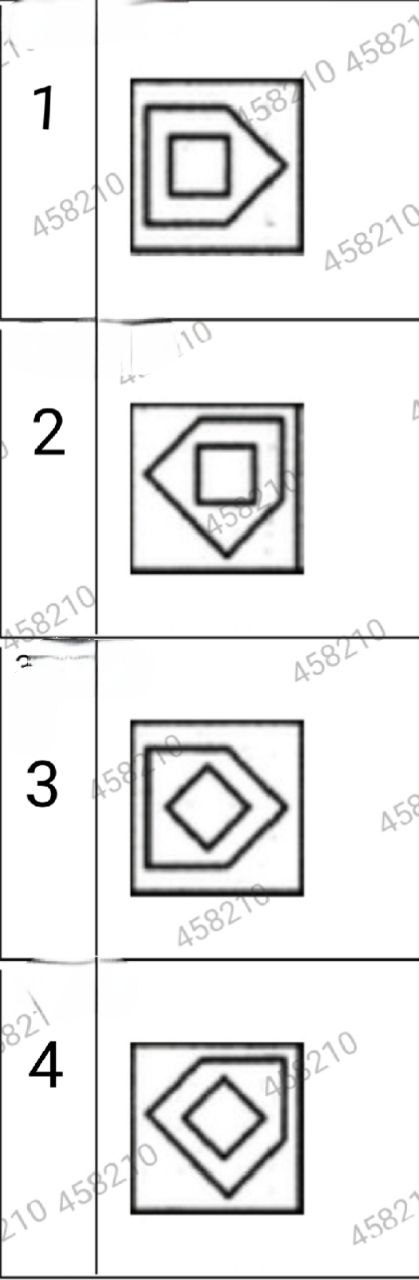
Approach: Paired figure series — Fig 1 : Fig 2 :: Fig 3 : Fig 4.
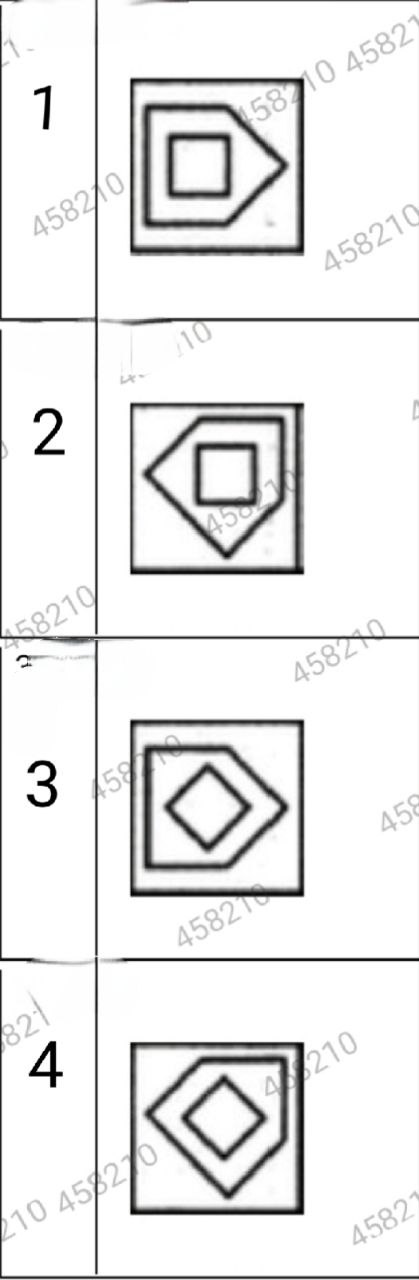
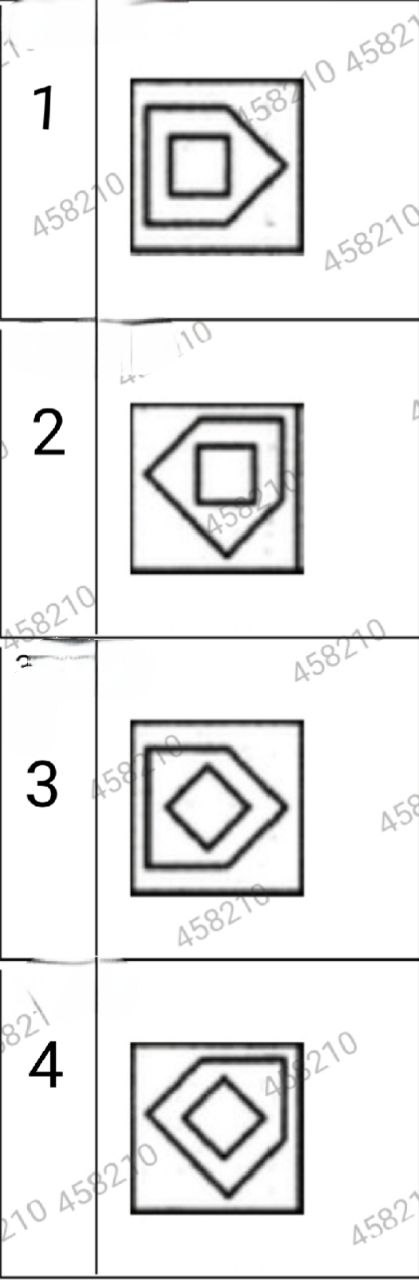
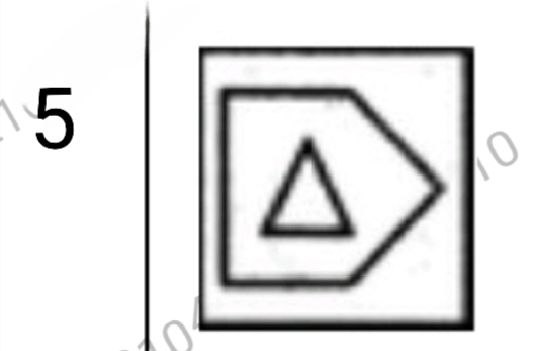
Solution: Fig 1 → Fig 2: the inner diamond turns 45° and becomes the outer figure (square); the outer inverted triangle is turned upside down and goes inside.
Apply the same change to Fig 3: the inner pentagon (house shape) turns 45° and becomes the outer figure; the outer diamond is inverted (still a diamond) and goes inside.
Option D shows the house shape turned 45° outside with a diamond inside.
Why the other options are wrong: A and B have a square inside instead of the diamond; C turns the pentagon by 90°; E has a triangle inside.
Cetking shortcut: Inner ↔ outer swap questions: identify the new outer shape first, then its rotation.
Answer: D
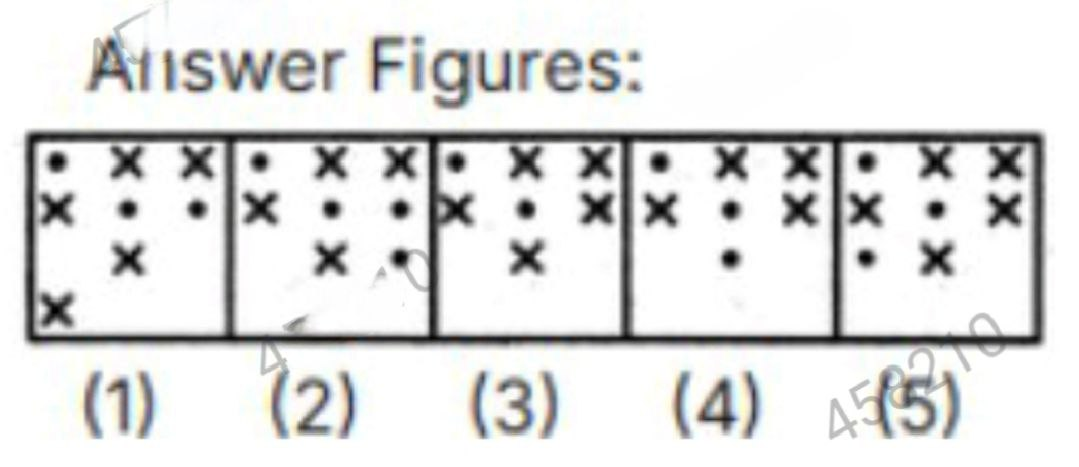
select a figure which from amongst the answer figures which will continue the same series as established by the five problem series
- A
- B
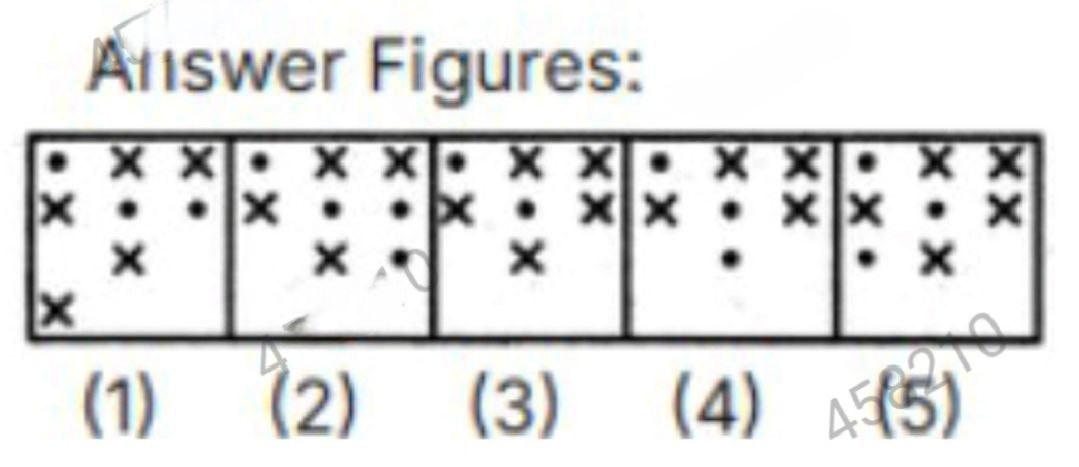
- C
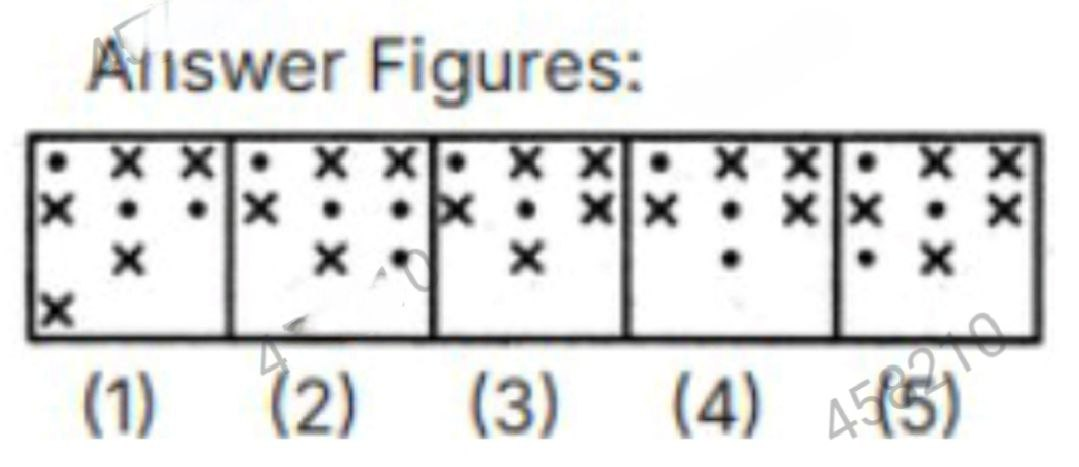
- D
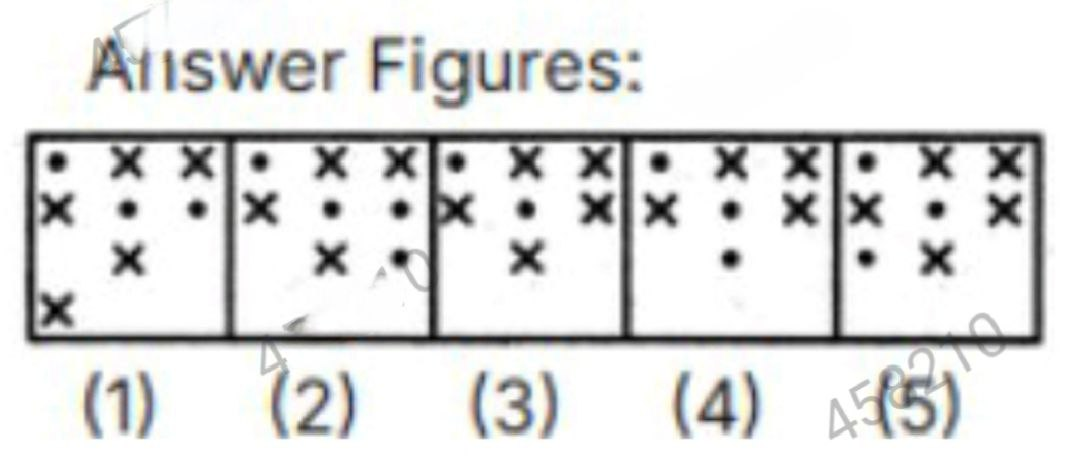
- E
Show answerHide answer
Answer: C
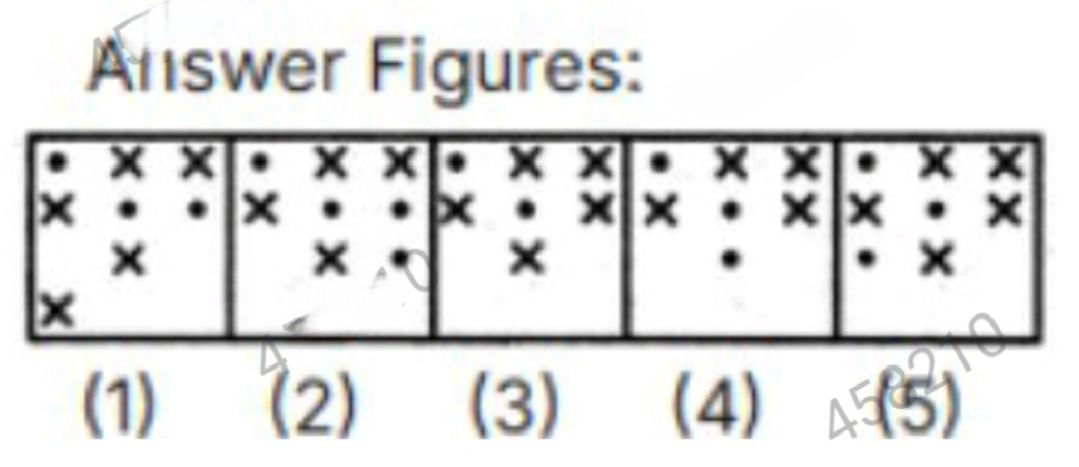
Approach: Figure series — count dots and crosses in every figure.
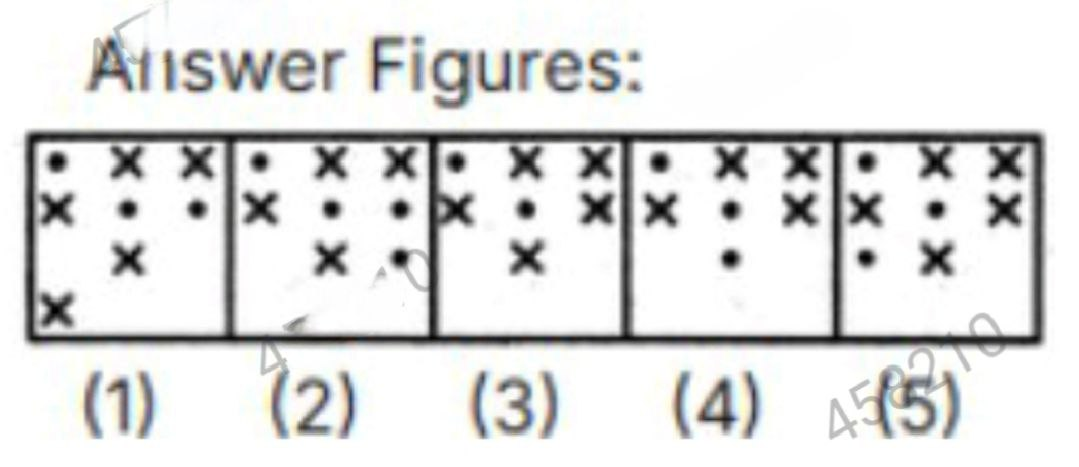
Solution: A: 12 dots, 0 ×. B: 10 dots, 1 ×. C: 8 dots, 2 ×. D: 6 dots, 3 ×. E: 4 dots, 4 ×.
Each step: one dot becomes × and one dot disappears → × +1, dots −2.
Next figure: 5 ×, 2 dots (7 symbols in all).
Option C has exactly 5 × and 2 dots.
Why the other options are wrong: A has 5 × but 3 dots; B has 4 × and 4 dots; D has 4 × and 3 dots; E has 5 × but 3 dots.
Cetking shortcut: Total symbols drop by one each step (12, 11, 10, 9, 8 → 7) — count totals first to eliminate fast.
Answer: C
Which shape comes next in the sequence?
- AA
- BB
- CC
- DD
- EE
Show answerHide answer
Answer: E
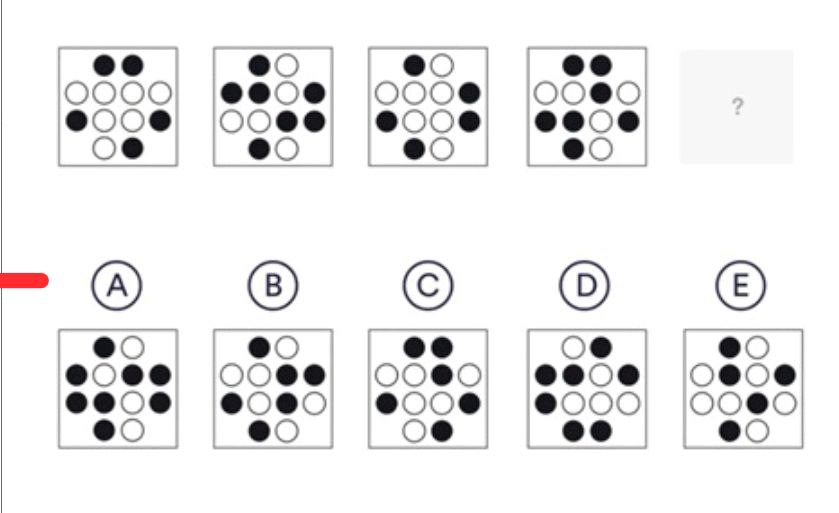
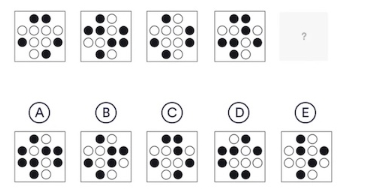
Approach: Figure series: count the black balls in each figure.
Solution: Each figure has 12 balls (rows of 2, 4, 4, 2).
Black balls: Fig 1 = 5, Fig 2 = 7, Fig 3 = 5, Fig 4 = 7 → alternate 5, 7, 5, 7.
Next figure must have 5 black balls.
Options: A = 8, B = 6, C = 6, D = 7, E = 5 → only E fits.
Why the other options are wrong:
A has 8, B and C have 6, D has 7 black balls.
Cetking shortcut: When positions look random, count the coloured elements – alternating counts are common.
Answer: E
- AA
- BB
- CC
- DD
- EE
Show answerHide answer
Answer: B
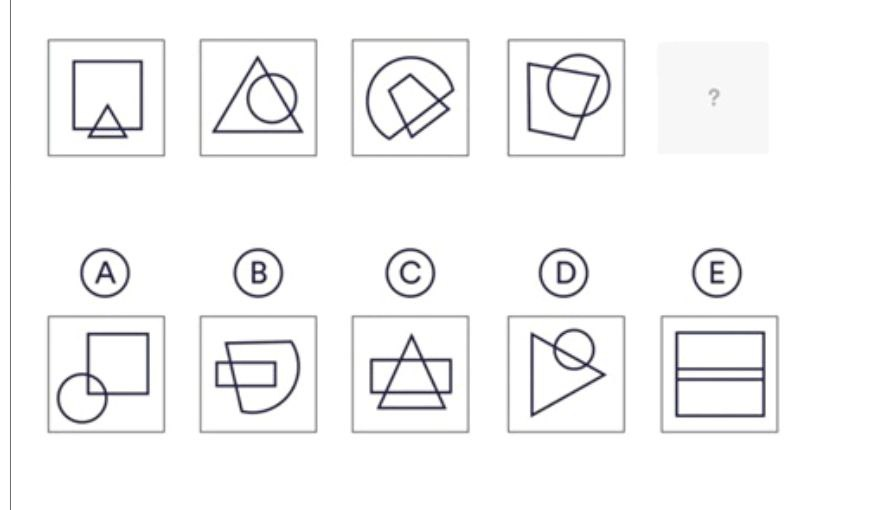
Approach: Figure series: the small inner shape of one figure becomes the big shape of the next.
Solution: Fig 1: big square, small triangle → Fig 2: big triangle, small circle → Fig 3: big circle (cut), small quadrilateral → Fig 4: big quadrilateral, small circle.
So Fig 5: big circle-type (curved) shape with a small quadrilateral – the Fig 3 pair again, i.e., the curved shape with a small rectangle.
Option B shows a big curved (D-shaped) figure with a small rectangle.
Why the other options are wrong:
A – big shape is a square, not curved.
C – big triangle.
D – big triangle.
E – no curved shape.
Cetking shortcut: Follow the small shape only: it tells you the next big shape.
Answer: B
- AA
- BB
- CC
- DD
- EE
Show answerHide answer
Answer: C
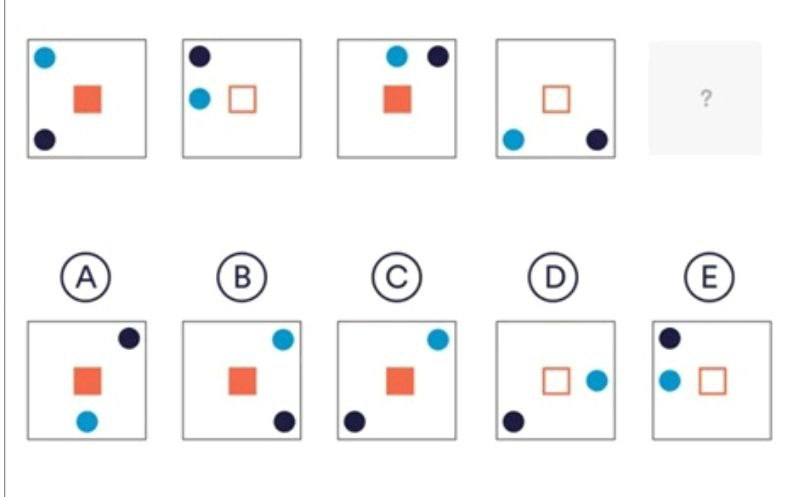
Approach: Figure series with three independent elements – track each one separately.
Solution: Black dot: bottom-left → top-left → top-right → bottom-right (corners, clockwise) → next bottom-left.
Blue dot (8 border positions): top-left → middle-left (1 step anticlockwise) → top-middle (2 clockwise) → bottom-left (3 anticlockwise) → next 4 steps clockwise: middle-left, top-left, top-middle, top-right.
Square: filled, hollow, filled, hollow → next filled.
Option C: blue at top-right, black at bottom-left, filled square.
Why the other options are wrong:
A – black dot at top-right. B – black at bottom-right. D, E – square hollow.
Cetking shortcut: Fix the easiest element first (square fill) – it removes D and E straight away.
Answer: C
- AA
- BB
- CC
- DD
- EE
Show answerHide answer
Answer: D
Approach: Figure series: track the shaded sectors and the 'doubled' symbol separately.
Solution: Shaded sectors: in each step both grey sectors move one place clockwise. Fig 5 greys are bottom-right and left → next bottom-left and top-left.
Doubled symbol: Fig 1 has two pluses, Fig 2 two stars, Fig 3 two hearts, Fig 4 two pluses, Fig 5 two stars → next has two hearts.
Only D has grey sectors at top-left and bottom-left with two hearts (left and right) and plus at top-right.
Why the other options are wrong:
A – greys at top-right and bottom-right.
B – right sectors fine but two stars, not two hearts.
C, E – grey sectors in wrong places.
Cetking shortcut: Use the grey sectors first – they leave only B and D; then the 'plus–star–heart' doubling picks D.
Answer: D
Choose the image that completes the pattern (From left to right):
- AA
- BB
- CC
- DD
- EE
Show answerHide answer
Answer: A
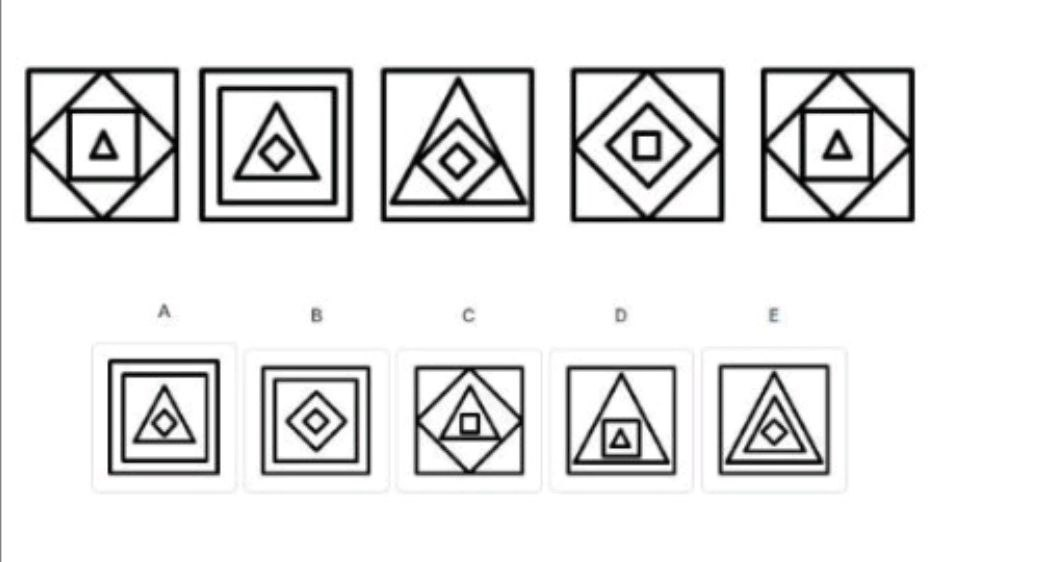
Approach: Figure series: look for a repeating cycle of the nested layers.
Solution: Layers (outside → inside):
Fig 1: square, diamond, square, small triangle
Fig 2: square, square, triangle, small diamond
Fig 3: square, triangle, diamond, small diamond
Fig 4: square, diamond, diamond, small square
Fig 5: square, diamond, square, small triangle = Fig 1.
Fig 5 repeats Fig 1, so the cycle is of 4 and Fig 6 = Fig 2: square, square, triangle, small diamond.
Option A matches.
Why the other options are wrong:
B – triangle missing (square, square, diamond, diamond).
C – diamond and small square layers.
D – triangle and square layers.
E – two triangles.
Cetking shortcut: When a later figure equals an earlier one, the series is cyclic – copy the figure that followed it.
Answer: A
Which of the boxes comes next in the sequence?
- AA
- BB
- CC
- DD
- EE
Show answerHide answer
Answer: B
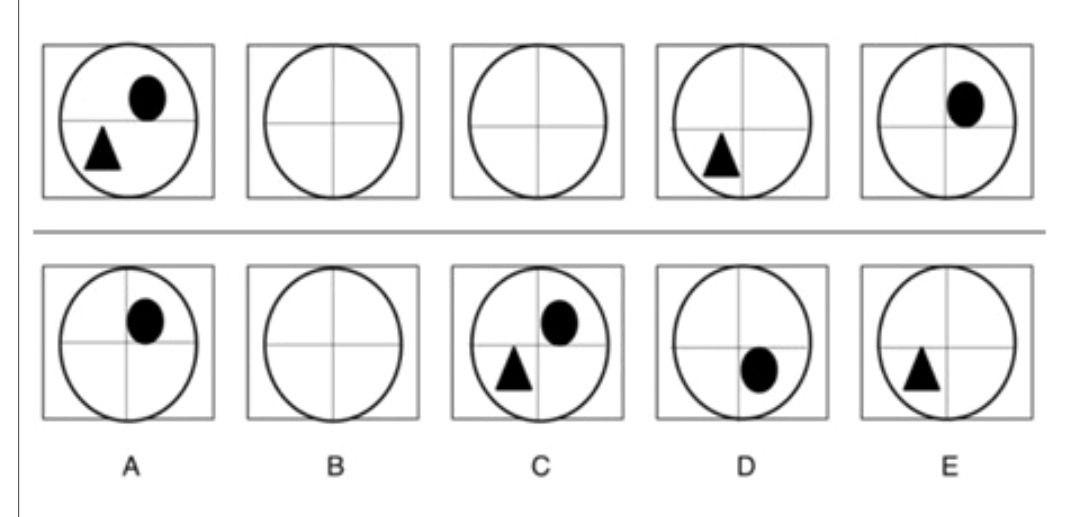
Approach: Figure series: each element appears at its own fixed interval.
Solution: Triangle (bottom-left) is visible in Fig 1 and Fig 4 → appears every 3rd figure → next in Fig 7.
Circle (top-right) is visible in Fig 1 and Fig 5 → appears every 4th figure → next in Fig 9.
Figs 2 and 3 are empty, which fits both rules.
Fig 6: neither the triangle (Fig 7) nor the circle (Fig 9) appears → the figure is empty.
Why the other options are wrong:
A – circle shown too early.
C – both shapes shown.
D – circle in the wrong place and too early.
E – triangle shown too early.
Cetking shortcut: Write the figure numbers in which each shape appears – the gaps reveal the cycle.
Answer: B
Which shape follows in the sequence?
- AA
- BB
- CC
- DD
- EE
Show answerHide answer
Answer: A
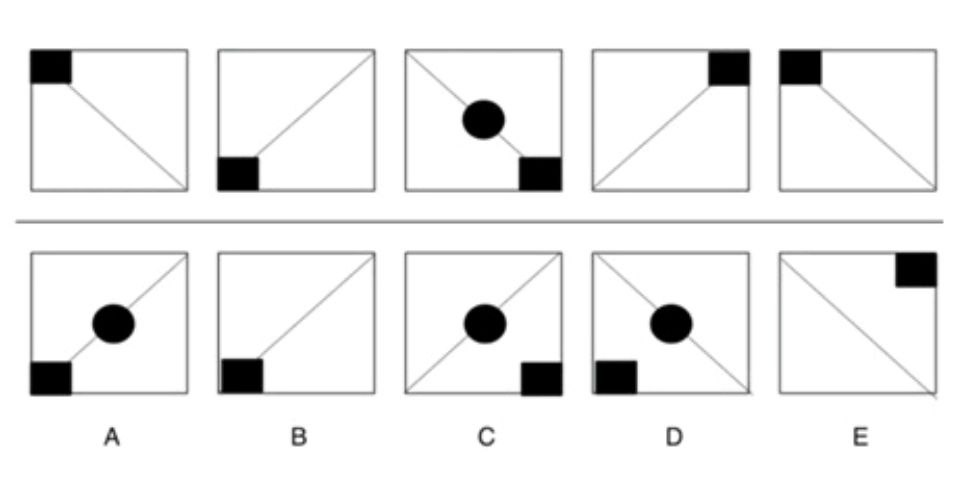
Approach: Figure series: track the black square, the diagonal and the circle separately.
Solution: Black square: top-left → bottom-left → bottom-right → top-right → top-left (corners, anticlockwise) → next bottom-left.
Diagonal: alternates top-left–bottom-right and bottom-left–top-right; Fig 5 has top-left–bottom-right → next bottom-left–top-right.
Circle: visible in the centre in Fig 3 only, i.e., it comes out every third figure → visible again in Fig 6.
Option A: square bottom-left, diagonal bottom-left–top-right, circle in the centre.
Why the other options are wrong:
B – no circle.
C – square in the wrong corner.
D – wrong diagonal.
E – no circle, square top-right.
Cetking shortcut: The diagonal always runs through the black square's corner – once you place the square, the diagonal is fixed.
Answer: A
Which box follows the sequence?
- AA
- BB
- CC
- DD
- EE
Show answerHide answer
Answer: D
Approach: Figure series: rotation of the horseshoe plus a symbol added in alternate figures.
Solution: Horseshoe opening: up → right → down → left → up – it turns 90° clockwise each step → next opening right (C-shape).
Fig 5 repeats Fig 1, so Fig 6 repeats Fig 2: C-shape with the black dot at the bend.
Triangle: present in Figs 2 and 4 (alternate figures) → present in Fig 6, in the upper arm as in Fig 2.
Option D matches Fig 2: C-shape, dot at the bend, triangle in the upper arm.
Why the other options are wrong:
A – no triangle.
B – opening to the left.
C – opening upward, no triangle.
E – no triangle, dot at the arm end.
Cetking shortcut: Fig 5 = Fig 1, so the cycle is 4 – the answer is a copy of Fig 2.
Answer: D
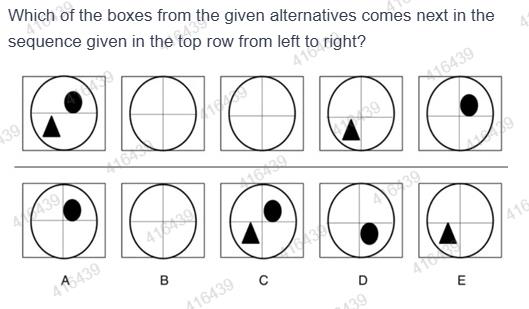
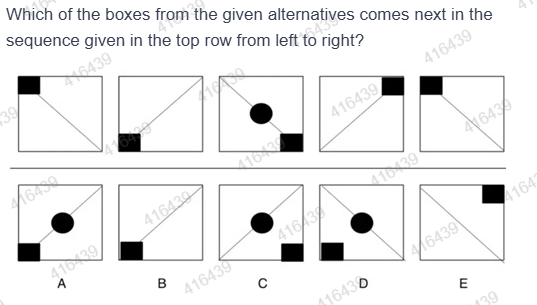
Which of the boxes from the given alternatives comes next in the sequence given in the top row from left to right?
- AA
- BB
- CC
- DD
- EE
Show answerHide answer
Answer: A
Approach: Figure series: track the arrow direction and the dot count separately.
Solution:
Arrow: up, down, right, left, up — a repeating 4-step cycle (up, down, right, left) ⇒ next: down.
Dots: 1, 2, 3, 4, 5 ⇒ next: 6 dots.
Option A has a down arrow with 6 dots.
Why the other options are wrong:
B: down arrow but only 3 dots.
C, D: arrow points right / up.
E: down arrow but 5 dots.
Cetking shortcut: Count dots first — it removes most options instantly.
Answer: A
Which of the boxes from the given alternatives comes next in the sequence given in the top row from left to right?
- AA
- BB
- CC
- DD
- EE
Show answerHide answer
Answer: D
Approach: Figure series: track rotation of the U, the triangle and the dot separately.
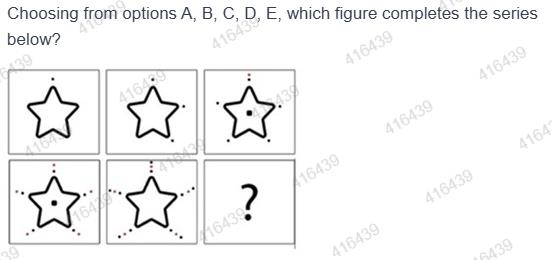
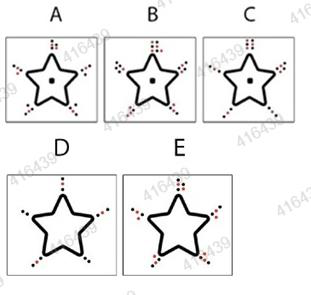
Solution:
The U-shape turns 45° clockwise each step: opening up → up-right → right → down-right → down ⇒ next: opening down-left.
The triangle appears in figures 1, 3, 5 (alternate) ⇒ figure 6 has no triangle.
The dot stays at the same arm end and rotates with the shape.
Option D: U opening down-left, no triangle, dot at the correct end.
Why the other options are wrong:
A, C: contain a triangle.
B: dot on the wrong arm.
E: shape turned 90° (opening left) instead of 45°.
Cetking shortcut: Use the triangle (alternate) to cut options first, then check rotation.
Answer: D
Which of the boxes from the given alternatives comes next in the sequence given in the top row from left to right?
- AA
- BB
- CC
- DD
- EE
Show answerHide answer
Answer: B
Approach: Figure series: track the black corner block and the circle colours.
Solution:
Black block: top-left → top-right → bottom-left → bottom-right → top-left ⇒ next: top-right.
The block pattern repeats every 4 figures, so figure 6 repeats figure 2's layout: 3 black and 2 white circles.
Option B has the block at top-right with 3 black and 2 white circles.
Why the other options are wrong:
A, C, D: block not at top-right.
E: block at top-right but mostly white circles.
Cetking shortcut: Fix the corner block first (only B and E remain), then compare circle colours.
Answer: B
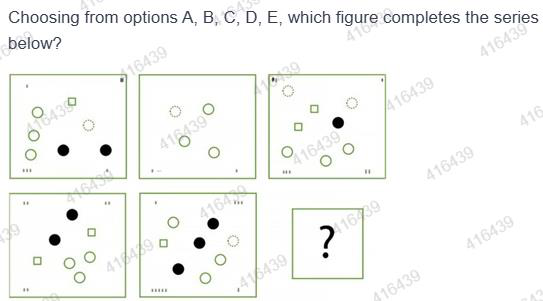
Choosing from options A, B, C, D, E, which figure completes the series below?
- AA
- BB
- CC
- DD
- EE
Show answerHide answer
Answer: E
Approach: Figure series: track the centre dot and the dots around the star tips separately.
Solution:
Centre dot: absent, absent, present, present, absent ⇒ pattern in pairs ⇒ figure 6: absent.
Dots around the tips keep increasing from figure to figure (1, then 3, then more dots spreading to every tip); figure 6 must have more dots than figure 5.
Options without a centre dot: D and E. D has fewer tip dots than figure 5; E continues the increase.
Why the other options are wrong:
A, B, C: have a centre dot.
D: the tip dots decrease instead of increasing.
Cetking shortcut: Use the centre-dot pair pattern to cut to two options, then compare dot density.
Answer: E
Choosing from options A, B, C, D, E, which figure will come next in the series given in the first row from left to right?
- AA
- BB
- CC
- DD
- EE
Show answerHide answer
Answer: C
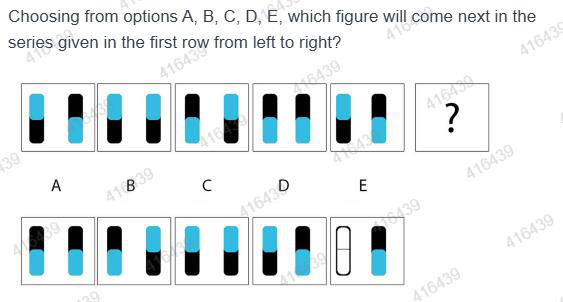
Approach: Figure series: track the colour order of the left bar and the right bar separately.
Solution:
Call a bar "U" if blue is on top and "K" if black is on top.
Left bar: U, U, K, K, U ⇒ pairs ⇒ next: U.
Right bar: K, U, U, K, K ⇒ next: U.
Figure 6: both bars blue on top — option C.
Why the other options are wrong:
A: both bars black on top.
B: left bar black on top.
D: right bar black on top.
E: left bar is blank.
Cetking shortcut: Split the figure into two independent sequences and solve each like a letter series.
Answer: C
Choosing from options A, B, C, D, E, which figure completes the series below?
- AA
- BB
- CC
- DD
- EE
Show answerHide answer
Answer: C
Approach: Figure series: track the special corner element, the triangle and the circle count.
Solution:
Special element (double circle / dot) moves clockwise one corner each step: top-left → top-right → bottom-right → bottom-left → top-left ⇒ next: top-right.
Triangle turns 90° each step (right angle at bottom-right → bottom-left → top-left → top-right → bottom-right) ⇒ next: right angle at bottom-left. Colour: black, black, white, white, black ⇒ next: black.
Plain circles drop one per figure (4, 3, 2, 1, 0) and the cycle restarts with all four.
Option C: four circles, double circle at top-right, black triangle with right angle at bottom-left.
Why the other options are wrong:
A: triangle white.
B: circles missing, dot instead of double circle.
D: triangle points the wrong way.
E: triangle white and special element at bottom-left.
Cetking shortcut: Triangle colour in pairs (black, black, white, white, black, black) cuts A and E straight away.
Answer: C
Choosing from options A, B, C, D, E, which figure will come next in the series given in the first row from left to right?
- AA
- BB
- CC
- DD
- EE
Show answerHide answer
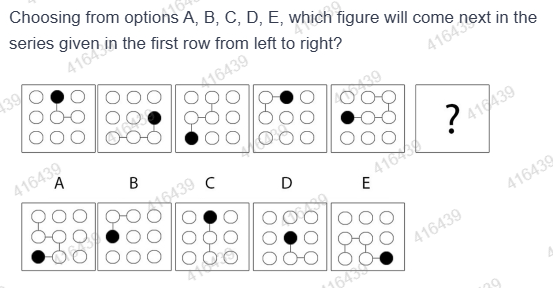
Answer: C
Approach: Figure series: follow the chain of connected circles — the black "head" jumps to the free end of the previous chain.
Solution:
Fig 1: head at top-middle, chain ends at middle-right ⇒ Fig 2 head at middle-right.
Fig 2 chain ends at bottom-left ⇒ Fig 3 head at bottom-left.
Fig 3 chain ends at top-middle ⇒ Fig 4 head at top-middle.
Fig 4 chain ends at middle-left ⇒ Fig 5 head at middle-left.
Fig 5 chain ends at top-middle ⇒ Fig 6 head at top-middle: option C.
Why the other options are wrong:
A: head at bottom-left.
B: head at middle-left.
D: head at the centre.
E: head at bottom-right.
Cetking shortcut: Look only at where the previous chain ends — the next black circle is there.
Answer: C
Choosing from options A, B, C, D, E, which figure will come next in the series given in the first row from left to right?
- AA
- BB
- CC
- DD
- EE
Show answerHide answer
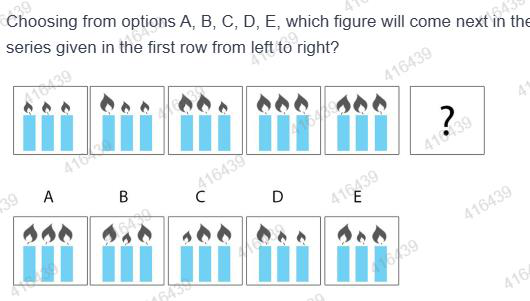
Answer: A
Approach: Figure series: track the flame size on each candle.
Solution:
Fig 1: all three flames small. Fig 2: first flame big. Fig 3: first two big. Fig 4: all three big.
Fig 5: all three big (they only change direction as a set).
Once a flame becomes big it stays big, so figure 6 must have three big flames.
Only option A has three big flames.
Why the other options are wrong:
B, C, D, E: each has at least one small flame.
Cetking shortcut: Big flames never shrink in the series — eliminate any option with a small flame.
Answer: A
Choosing from options A, B, C, D, E, which figure will come next in the series given in the first row from left to right?
- AA
- BB
- CC
- DD
- EE
Show answerHide answer
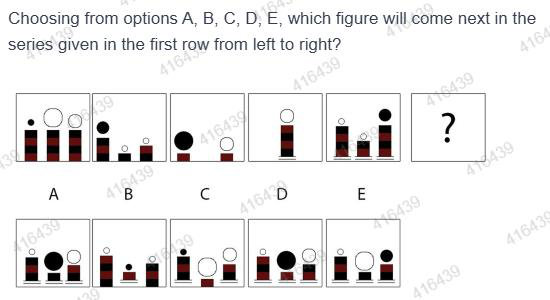
Answer: A
Approach: Figure series: compare base lines, column band colours and circles feature by feature, eliminating options.
Solution:
Figures 4 and 5 stand on base lines under every column, so figure 6 must have base lines under all three columns — this removes B and C.
In figures 1, 2 and 5 every column has a black top band; D's columns start with a red band — D is out.
Between A and E, A keeps three columns of 3, 1 and 2 bands with a small white, a big black and a medium white circle; this is the option that completes the series.
Why the other options are wrong:
B, C: base lines missing under some columns.
D: columns topped with red bands.
E: big circle is white and the black circle is on the right-hand column.
Answer: A
Choosing from options A, B, C, D, E, which figure will come next in the series given in the first row from left to right?
- AA
- BB
- CC
- DD
- EE
Show answerHide answer
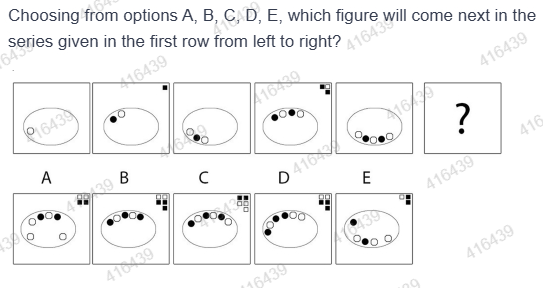
Answer: C
Approach: Figure series: track number and colour of circles in the oval and the corner squares.
Solution:
Circles in the oval: 1, 2, 3, 4, 5 ⇒ next: 6.
Colours alternate black/white along the row (fig 4: b w b w; fig 5: w b w b w) ⇒ fig 6: b w b w b w.
Corner squares appear in even figures: 1 (fig 2), 3 (fig 4) ⇒ fig 6: 5 squares; in even figures the circles sit on the upper arc.
Option C: 6 alternating circles on the upper arc with 5 corner squares.
Why the other options are wrong:
A: circles scattered, 4 corner squares.
B: only 5 circles.
D: colours not alternating.
E: circles on the lower arc.
Cetking shortcut: Count circles first (must be 6) — only C and D remain; then check alternation.
Answer: C
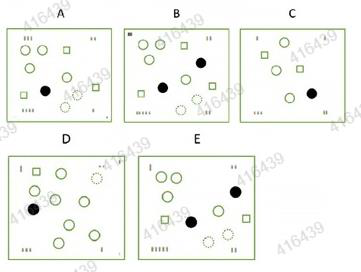
Choosing from options A, B, C, D, E, which figure completes the series below?
- AA
- BB
- CC
- DD
- EE
Show answerHide answer
Answer: B
Approach: Figure series (element counting): count each element type in every figure and compare with the options.
Solution:
Counts in the question figures (white circles / squares / dotted circles / black circles):
Fig 1: 3 / 1 / 1 / 2. Fig 2: 3 / 0 / 1 / 0. Fig 3: 3 / 2 / 2 / 1. Fig 4: 3 / 2 / 0 / 2. Fig 5: 3 / 1 / 1 / 3.
Corner tally marks change along with these counts.
Option B completes the series.
Cetking shortcut: Make a quick count table per element type before comparing options.
Answer: B
Which of the boxes from the given alternatives comes next in the sequence given in the top row from left to right?
- AA
- BB
- CC
- DD
- EE
Show answerHide answer
Answer: B
Approach: Figure series: find the repeat cycle of each element separately.
Solution:
Triangle appears in figures 1 and 4 ⇒ every 3rd figure (1, 4, 7, …).
Black oval appears in figures 1 and 5 ⇒ every 4th figure (1, 5, 9, …).
Figure 6 is in neither cycle ⇒ the circle is empty.
Option B: empty circle.
Why the other options are wrong:
A: has the oval (next due in figure 9).
C: has both elements.
D, E: have one element each.
Cetking shortcut: When elements appear and vanish, write the figure numbers in which each appears and find its period.
Answer: B
Which of the boxes from the given alternatives comes next in the sequence given in the top row from left to right?
- AA
- BB
- CC
- DD
- EE
Show answerHide answer
Answer: A
Approach: Figure series: track the black square, the diagonal and the dot.
Solution:
Black square moves anticlockwise one corner each step: top-left → bottom-left → bottom-right → top-right → top-left ⇒ next: bottom-left.
The diagonal always starts from the square's corner ⇒ next diagonal runs bottom-left to top-right.
The dot appears in figure 3 ⇒ every 3rd figure ⇒ figure 6 has the dot.
Option A: square bottom-left, diagonal bottom-left–top-right, dot present.
Why the other options are wrong:
B: no dot.
C: square at bottom-right.
D: diagonal does not start from the square.
E: square at top-right, no dot.
Cetking shortcut: Square position cuts to A, B, D; the dot and diagonal settle it.
Answer: A
Which of the boxes from the given alternatives comes next in the sequence given in the top row from left to right?
- AA
- BB
- CC
- DD
- EE
Show answerHide answer
Answer: D
Approach: Figure series: track the opening of the U, the triangle and the dot.
Solution:
The opening of the U turns 90° clockwise each step: up → right → down → left → up ⇒ next: opening right (C-shape).
Triangle appears in alternate figures (2, 4) ⇒ figure 6 has a triangle, at the arm tip as in figure 2.
Dot rides along the curve with the shape; in a C-shape it sits on the curved left side, as in figure 2.
Option D matches figure 2's pattern: C-shape, triangle at the top arm, dot on the curve.
Why the other options are wrong:
A, E: no triangle.
B: opening faces left.
C: opening faces up.
Cetking shortcut: Figure 6 must equal figure 2 because the U repeats every 4 figures and the triangle every 2.
Answer: D
Which of the boxes from the given alternatives comes next in the sequence given in the top row from left to right?
- AA
- BB
- CC
- DD
- EE
Show answerHide answer
Answer: E
Approach: Figure series: count black circles in each figure.
Solution:
Black circles: Fig 1 = 5, Fig 2 = 7, Fig 3 = 5, Fig 4 = 7 ⇒ alternating 5, 7 ⇒ figure 5 has 5.
Option counts: A = 8, B = 6, C = 6, D = 7, E = 5.
Only E has 5 black circles.
Why the other options are wrong:
A: 8 black.
B, C: 6 black.
D: 7 black.
Cetking shortcut: Count only black circles — positions do not matter here.
Answer: E
Which of the boxes from the given alternatives comes next in the sequence given in the top row from left to right?
- AA
- BB
- CC
- DD
- EE
Show answerHide answer
Answer: B
Approach: Figure series: the overlap region of one figure becomes the main shape of the next.
Solution:
Fig 1: square and triangle overlap in a triangle ⇒ Fig 2's main shape is a triangle.
Fig 2: triangle and circle overlap in a circle cut by a straight edge ⇒ Fig 3's main shape is that cut circle.
Fig 3: the overlap is a quadrilateral ⇒ Fig 4's main shape is a quadrilateral.
Fig 4: the overlap of quadrilateral and circle is a circle cut by straight edges (a D-like shape) ⇒ Fig 5's main shape is that D-like shape.
Option B has the D-like shape (straight sides with a curved side) as its main figure.
Why the other options are wrong:
A, C, D, E: main shapes are a square, a triangle, a triangle and a rectangle — none is the arc-and-line overlap shape of figure 4.
Cetking shortcut: Mark the overlap in the last figure and look for an option whose big shape copies it.
Answer: B
Choose the image from the given alternatives that completes the pattern in the top row (From left to right):
- AA
- BB
- CC
- DD
- EE
Show answerHide answer
Answer: A
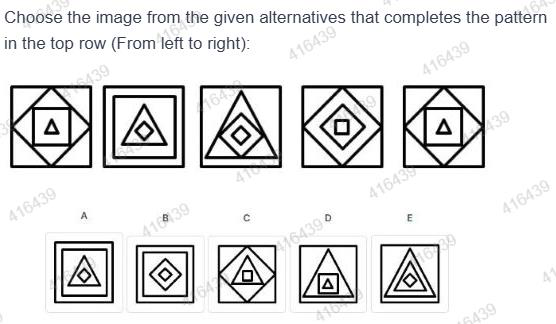
Approach: Figure series: nested shapes repeat with a cycle of 4.
Solution:
Fig 1: square ⊃ diamond ⊃ square ⊃ triangle. Fig 5 is identical to Fig 1 ⇒ the series repeats every 4 figures.
So Fig 6 = Fig 2: square ⊃ square ⊃ triangle ⊃ diamond.
Option A shows square ⊃ square ⊃ triangle ⊃ diamond.
Why the other options are wrong:
B: missing the triangle layer.
C: nesting order different (diamond outside).
D: triangle contains a square, not a diamond.
E: innermost is a triangle, not a diamond.
Cetking shortcut: When a later figure equals an earlier one, the next answer equals the figure after that earlier one.
Answer: A
Choose the image from the given alternatives that completes the pattern in the top row (From left to right):
- AA
- BB
- CC
- DD
- EE
Show answerHide answer
Answer: D
Approach: Figure series: track the grey sectors and each symbol separately around the 6 sectors.
Solution:
Grey pair moves one sector clockwise each step: (TR, L) → (R, TL) → (BR, TR) → (BL, R) → (L, BR) ⇒ next: (TL, BL).
Plus moves one sector anticlockwise: TL → L → BL → BR → R ⇒ next: TR.
Heart moves one sector anticlockwise: BL → BR → R → TR → TL ⇒ next: L.
Star moves one sector anticlockwise: R → TR → TL → L → BL ⇒ next: BR.
Option D: grey at TL and BL, plus at TR, heart at L, star at BR.
Why the other options are wrong:
A, C, E: grey sectors in the wrong place.
B: grey correct but the heart is not at the left sector.
Cetking shortcut: Fix the grey sectors first (B and D remain), then check one symbol.
Answer: D
The following question consists of five figures marked A, B, C, D and E (Problem Figures) followed by five other figures marked 1, 2, 3, 4 and 5 called the Answer Figures. Select a figure from amongst the Answer Figures which will continue the same series as established by the five Problem Figures.
- A
 (Answer Figure 1)
 - B
 (Answer Figure 2)
 - C
 (Answer Figure 3)
 - D
 (Answer Figure 4)
 - E
 (Answer Figure 5)
Show answerHide answer
Answer: A
Approach: Figure series: track each element separately (symbol type, symbol position, star position).
Solution:
Main symbol cycles: bulb (A) → leaf (B) → flower (C) → bulb (D) → leaf (E) → so the next is flower.
Each symbol type keeps its orientation when it comes back (bulb A = bulb D, leaf B = leaf E). So the flower must look exactly as in C: tilted, with the stalk at the lower left.
The star alternates top-right (A, C, E) and bottom-left (B, D), so the next figure has the star at the bottom-left.
The main symbol alternates between the edge/corner and the centre region (A edge, B centre, C corner, D centre, E edge), so the next is in the centre.
Figure 1 has the tilted flower, same as C, in the centre with the star at the bottom-left.
Why the other options are wrong:
4, 5: the flower is upright (rotated), not as in C.
2: the flower head is drawn differently (rotated head), not the same as C.
3: very close to 1, but the head is not drawn exactly as in C. Compare the petals carefully.
Cetking shortcut: In a three-symbol cycle, the next symbol is a copy of the figure three steps back (C), so match against C.
Answer: A
The following question consists of five figures marked A, B, C, D and E (Problem Figures) followed by five other figures marked 1, 2, 3, 4 and 5 called the Answer Figures. Select a figure from amongst the Answer Figures which will continue the same series as established by the five Problem Figures.
- A
 (Answer Figure 1)
 - B
 (Answer Figure 2)
 - C
 (Answer Figure 3)
 - D
 (Answer Figure 4)
 - E
 (Answer Figure 5)
Show answerHide answer
Answer: D
Approach: Figure series: track the position of the shaded pair and the type of shading.
Solution:
Shaded pair positions: A top + bottom tips, B left pair, C left pair, D top + bottom tips, E right pair, so the next is right pair again (each side appears twice).
When a position repeats, the two shadings swap: A (top = horizontal, bottom = vertical) → D (top = vertical, bottom = horizontal). B (upper = horizontal, lower = vertical) → C (upper = vertical, lower = horizontal).
E has the right pair with upper = vertical and lower = horizontal, so the next has the right pair with upper = horizontal and lower = vertical.
That is figure 4.
Why the other options are wrong:
1: right pair, but the shading is the same as in E (not swapped).
2, 3: top and bottom tips, which is the wrong position.
5: cross-hatched centre, a new element not in the series.
Cetking shortcut: Look for the repeat-and-swap pattern: whenever a shaded pair comes back to the same spot, its two shadings change places.
Answer: D
The following question consists of five figures marked A, B, C, D and E (Problem Figures) followed by five other figures marked 1, 2, 3, 4 and 5 called the Answer Figures. Select a figure from amongst the Answer Figures which will continue the same series as established by the five Problem Figures.
- A
 (Answer Figure 1)
 - B
 (Answer Figure 2)
 - C
 (Answer Figure 3)
 - D
 (Answer Figure 4)
 - E
 (Answer Figure 5)
Show answerHide answer
Answer: B
Approach: Figure series: track the inner symbols, the small circle and the black triangle separately.
Solution:
Inner symbols: 1 star, 1 square, 1 '?', 2 stars, 2 squares, so the next is 2 '?' in a horizontal row (like D and E).
Small circle moves 45° clockwise each step: right → bottom-right → bottom → bottom-left → left, so the next is top-left.
Black triangle moves 45° anticlockwise each step: bottom-right → right → top-right → top → top-left, so the next is left.
Figure 2 has '??' side by side, the circle at top-left and the triangle at left.
Why the other options are wrong:
1: only one '?'.
3: the triangle is at the top.
4: has three squares.
5: the two '?' are stacked vertically.
Cetking shortcut: Track the two outer markers separately. They move in opposite directions, 45° each step.
Answer: B
The following question consists of four figures marked A, B, C and D (Problem Figures) followed by five other figures marked 1, 2, 3, 4 and 5 called the Answer Figures. Select a figure from amongst the Answer Figures which will continue the same series as established by the four Problem Figures.
- A
 (Answer Figure 1)
 - B
 (Answer Figure 2)
 - C
 (Answer Figure 3)
 - D
 (Answer Figure 4)
 - E
 (Answer Figure 5)
Show answerHide answer
Answer: B
Approach: Figure series: one curve is removed at each step, taking left and right sides in turn.
Solution:
A: both sides have a top curl, a middle bulge and a bottom curl.
B: the left bottom curl becomes straight.
C: the right bottom curl becomes straight.
D: the left middle bulge becomes straight.
Next: the right middle bulge becomes straight, leaving both sides straight with only the two top curls. That is figure 2.
Why the other options are wrong:
1: the right side still has its bulge and bottom curl (a step backwards).
3: the left top curl has gone and the right bulge is back.
4: the right top is cut off before the bulge is removed.
5: removes the left top curl, skipping the right bulge that comes first.
Cetking shortcut: Count the curves left in each figure: 6, 5, 4, 3, so the next must have exactly 2 curves left (the two top curls).
Answer: B
The following question consists of four figures marked A, B, C and D (Problem Figures) followed by five other figures marked 1, 2, 3, 4 and 5 called the Answer Figures. Select a figure from amongst the Answer Figures which will continue the same series as established by the four Problem Figures.
- A
 (Answer Figure 1)
 - B
 (Answer Figure 2)
 - C
 (Answer Figure 3)
 - D
 (Answer Figure 4)
 - E
 (Answer Figure 5)
Show answerHide answer
Answer: C
Approach: Figure series: the figures alternate between two layouts; track each shape's move within its layout.
Solution:
A and C use a corner layout with the star in the centre. B and D use a middle-row layout (triangle, circle, square) with the star in a corner.
A → C: the circle moves diagonally (top-left → bottom-right), the triangle moves up one place (bottom-left → top-left) and the square moves up one place (bottom-right → top-right). The star stays in the centre.
Apply the same moves to C: the circle goes diagonally back (bottom-right → top-left), the triangle moves up, wrapping round (top-left → bottom-left), and the square moves up, wrapping round (top-right → bottom-right).
Result: circle top-left, star centre, triangle bottom-left, square bottom-right. That is figure 3, the same as A.
Why the other options are wrong:
1, 2: the square is at the top-right (the layout of C, not the next step).
4: the square is in the centre.
5: the star is at the top, not the centre.
Cetking shortcut: Two layouts alternate (A, C, E vs B, D), and within the A–C–E chain the shapes come back to A's arrangement.
Answer: C
- AOption 1
- BOption 2
- COption 3
- DOption 4
- EOption 5
Show answerHide answer
Answer: E
Approach: Track the central bracket and the four outer arcs separately.
Solution:
The central bracket turns 90° anticlockwise and 180° alternately: ∩ → ⊏ → ⊐ → ∩ → ∪, so the next step (90° anticlockwise) gives ⊐ — the form shown in every answer figure.
The four small arcs around it change their curvature (facing in / facing out) step by step; continuing that change, answer figure (5) is the only one whose arcs match the next stage.
Answer: E
Choose the option that will come in place of ?
- AOption A
- BOption B
- COption C
- DOption D
- EOption E
Show answerHide answer
Answer: E
Approach: Count the black dots in each figure (12 dots per figure).
Solution:
Black dots: Fig 1 = 5, Fig 2 = 7, Fig 3 = 5, Fig 4 = 7 → the count alternates 5, 7, 5, 7, so the next figure must have 5 black dots.
Options: A = 8, B = 6, C = 6, D = 7, E = 5.
Only (E) has 5 black dots.
Cetking shortcut: In dot-grid series, count black dots first — it often eliminates four options at once.
Answer: E
Select a figure from the Answer Figures which will continue the same series as established by the five Problem Figures.
- AOption 1
- BOption 2
- COption 3
- DOption 4
- EOption 5
Show answerHide answer
Answer: C
Approach: Track the arrow and the black triangle separately.
Solution:
1. Arrow (the end with the arrowhead): down, left, up-left, up-right, right. It turns 90°, 45°, 90°, 45° clockwise, so the next turn is 90° clockwise and the arrow points down again, as in every answer figure.
2. Black triangle: its right-angle corner sits at top-left (A), bottom-right (B), the right corner of the tilted figure (C), the left corner (D) and bottom-left (E). It turns 180°, 45°, 180°, 45° anticlockwise, so the next turn is 180° anticlockwise.
3. From bottom-left, a 180° turn puts the right-angle corner at the top-right: the figure is upright with the arrow down, and the diagonal runs from top-left to bottom-right with the black part above it.
Answer figure (3) shows exactly this.
Why the other options are wrong:
(1), (2), (4), (5) place the right-angle corner of the black triangle at a different corner.
Answer: C
Following question consists of four Problem Figures marked A, B, C and D and five Answer Figures marked a), b), c), d), and e). Select a figure from amongst the Answer Figures which will continue the series established by the four Problem Figures.
- AOption 1
- BOption 2
- COption 3
- DOption 4
- EOption 5
Show answerHide answer
Answer: C
Approach: Compare alternate figures (A, C, E and B, D).
Solution:
B and D both have triangle, circle and square in the middle row; only the star moves.
A and C both keep the star in the centre with the other three symbols in corners; the series alternates between these two layouts.
So the fifth figure returns to the layout of A: circle top-left, star centre, triangle bottom-left, square bottom-right.
Answer figure (3) is exactly this.
Answer: C
Following question consists of four Problem Figures marked A, B, C and D and five Answer Figures marked a), b), c), d), and e). Select a figure from amongst the Answer Figures which will continue the series established by the four Problem Figures.
- AOption 1
- BOption 2
- COption 3
- DOption 4
- EOption 5
Show answerHide answer
Answer: B
Approach: Each step straightens one curve of the figure.
Solution:
A: both legs have a top curl, a middle bulge and a bottom curl.
B: one bottom curl straightened. C: the other bottom curl straightened. D: the left middle bulge straightened (the right leg still has a small bulge).
Next: straighten the remaining right bulge → top curls on both sides with two straight legs.
Answer figure (2) shows this.
Why the other options are wrong:
(1): wavy leg returns. (3), (4): a top curl removed while the bulge rule is unfinished. (5): both top curls removed — two steps at once.
Answer: B
Which option as given in the lower row shall come next in sequence in the upper row?
- AOption A
- BOption B
- COption C
- DOption D
- EOption E
Show answerHide answer
Answer: D
Approach: Track the band's rotation, the circle's end, and the triangle separately.
Solution:
The U-shaped band turns 45° clockwise each step: opening up → up-right → right → down-right → down. Next: opening down-left.
The circle stays on the same end of the band; in figure 5 it is on the lower-right end, which after a further 45° clockwise turn becomes the lower end.
The triangle appears only in figures 1, 3, 5 → it is absent in figure 6.
Option D: band opening down-left, circle at the lower end, no triangle.
Why the other options are wrong:
A, C: contain a triangle.
B: circle on the upper end.
E: band opening left (90° turn, not 45°).
Answer: D
Which option as given in the lower row shall come next in sequence in the upper row ?
- AA
- BB
- CC
- DD
- EE
Show answerHide answer
Answer: D
Approach: Track three things: rotation of the U, position of the dot, presence of the triangle.
Solution:
U rotates 45° clockwise each step: opening up → up-right → right → down-right → down → next: down-left.
The dot stays at the end of the same arm (the original left arm), which rotates with the U → in figure 6 it is on the lower-right arm.
Triangle appears in figures 1, 3, 5 → absent in figure 6.
Opening down-left, dot on lower-right arm, no triangle → option D.
Why the other options are wrong:
A / C: contain a triangle.
B: dot on the upper-left arm (wrong arm).
E: opening left – rotation of 90° instead of 45°.
Cetking shortcut: First eliminate by the triangle (alternate figures), then by the dot's arm.
Answer: D
Choose the option from the options given in the lower row that shall complete the pattern given in the upper row ?
- AA
- BB
- CC
- DD
- EE
Show answerHide answer
Answer: A
Approach: Look for a repeating cycle in the series of nested shapes.
Solution:
Figure 5 is identical to figure 1 → the series repeats every 4 figures.
So figure 6 = figure 2: outer square, square, triangle, innermost diamond.
Option A matches.
Why the other options are wrong:
B: has no triangle.
C: diamond-triangle-square order differs.
D: square inside a triangle.
E: triangle inside a triangle.
Cetking shortcut: When the last given figure equals an earlier one, the next is simply the figure after that earlier one.
Answer: A